
SDK Integration
IMPORTANT NOTE
SDK support & versioning
At Thryve, we have committed ourselves to provide a more robust, efficient and easy to integrate system, as well as coming to a point where we can provide quicker and longer support on our releases.
From SDK Version 4.2.0 onwards, when released, all modules in each of the SDK's ( Android and iOS ) will be published and updated using a Unified Versioning Scheme based on semantic versioning.
But, What does that mean for our integration?
In the short term, it means easily understanding the version of the SDK you're using, it's features, any new changes, any known issues, and ensuring module inter-compatibility.
When should we upgrade to a new SDK Version?
Ideally, we would love to be able to provide you with our most recent integrations and improvements, but we understand that changes in a running environment take time and therefore we want to be able to help you adapt to those > changes. Stay tuned to know more about the process we're building to ensure you can get the most out of our system.
The SDK allows your users to connect 3rd party health data sources like Apple Health, Fitbit or Withings with your app through Thryve, as well as native data retrieval and data collection through specific SDK modules.
Integrating the Thryve SDK within your Android and iOS apps (→ see sections for iOS or Android respectively) is a plug & play process and will allow you to establish a data source connection with only two requests:
- Generate a Thryve token (and store it with your user)
- Bring up the data sources connection for this user
If a successful connection is established, your users’ data will start to flow to Thryves data warehouse, where you can retrieve it through our wearable API at any time.
This standard process can be flexibly adapted and expanded to match exactly your needs – from individual styling (→ see custom data source connection screen) to the integration of on-device data retrieval of native data sources (→ see HealthKit, Google Fit Native, SHealth and Health Connect modules) and on-device health data generation (→ see Google Fit Native).
Get access to Thryve's SDK and integrate 500+ wearables with your appGet started
SDKs and Modules
Thryve’s SDKs for Android and iOS app consist of one CoreSDK and several optional modules, you only need to integrate the functionalities you want to use. SDK modules are separated libraries that can coexist in your application environment.
Thryve Core SDK
The CoreSDK brings everything you need to allow your users to connect all OAuth and Direct Access data sources with your app via Thryve. The CoreSDK contains all necessary routines to create Thryve access tokens, to display Thryve’s or your own data source connection page and to allow your users to establish a data source connection.
Thryve Commons module
The Thryve Commons module is required to use any of the additional SDK modules. This module provides database and server synchronization logic needed for the additional modules.
Native data source modules
The SDK modules for Apple Health, Google Fit (native), Samsung Health and Health Connect allow your users to connect and share data from native data sources with you. The corresponding SDK modules allow to establish a data source connection with native sources and to retrieve data.
iOS integration
The iOS SDKs and modules for native apps are designed as iOS frameworks. As previously described, the CoreSDK provides all necessary methods to allow your users to establish a data sources connection with OAuth and Direct Access data sources. The different modules are extensions to the SDK’s functionality with additional data retrieval routines. It is required to instantiate the CoreConnector when using any of the additional modules. The integration of the Apple Health Module is required to access data through Apple HealthKit. The CoreSDK and all modules have separate constructors to set up the corresponding object instance needed to call the desired method.
...
post_install do |installer|
    # strip bitcode off all pods -
    installer.pods_project.targets.each do |target|
      target.build_configurations.each do |config|
        config.build_settings['ENABLE_BITCODE'] = 'NO'
      end
    end
    bitcode_strip_path = `xcrun --find bitcode_strip`.chop!
    def strip_bitcode_from_framework(bitcode_strip_path, framework_relative_path)
      framework_path = File.join(Dir.pwd, framework_relative_path)
      command = "#{bitcode_strip_path} #{framework_path} -r -o #{framework_path}"
      puts "Stripping bitcode: #{command}"
      system(command)
    end

    framework_paths = [
      "Pods/ModuleAppleHealth/ModuleAppleHealth.xcframework/ios-arm64/ModuleAppleHealth.framework/ModuleAppleHealth",
      "Pods/ModuleAppleHealth/ModuleAppleHealth.xcframework/ios-arm64_x86_64-simulator/ModuleAppleHealth.framework/ModuleAppleHealth",
      "Pods/ThryveCommons/ThryveCommons.xcframework/ios-arm64/ThryveCommons.framework/ThryveCommons",
      "Pods/ThryveCommons/ThryveCommons.xcframework/ios-arm64_x86_64-simulator/ThryveCommons.framework/ThryveCommons",
    ]

    framework_paths.each do |framework_relative_path|
      strip_bitcode_from_framework(bitcode_strip_path, framework_relative_path)
    end
  end
...
iOS SDK Integration via Cocoapods
Since Thryve iOS SDK version 4.12.0, we are supporting the SDK integration via Cocoapods. The PodSpecs are available via https://git.thryve.de/thryve/Specs.git and will be updated to the latest version with every SDK release.
Navigate to your iOS Application folder and add the Specs via Terminal as a Pod-Repo, e.g.:
pod repo add ThryveSpecs https://git.thryve.de/thryve/Specs.git
Ensure that your Podfile includes the correct source and refers to the SDK- and Module-Pods that you need in your iOS Application. Please refer to the right for an example and to the iOS sample project.
platform :ios, '13.0'
source 'https://git.thryve.de/thryve/Specs.git'

target 'ThryveConnectorSample' do

use_frameworks!

pod 'ThryveCore', '4.12.8'
pod 'ThryveCommons', '4.12.8'
pod 'ModuleAppleHealth', '4.12.8'

end
Execute pod install. The Pods should be installed and now available in your project.
% pod install
Analyzing dependencies
Downloading dependencies
Installing ModuleAppleHealth (4.12.8)
Installing ThryveCommons (4.12.8)
Installing ThryveCore (4.12.8)
Generating Pods project
Integrating client project
Pod installation complete! There are 4 dependencies from the Podfile and 4 total pods installed.
iOS SDK Integration via XCFramework-file
To integrate the Thryve SDK with your iOS app, please download the latest SDK and required modules and follow these steps:
Add framework file
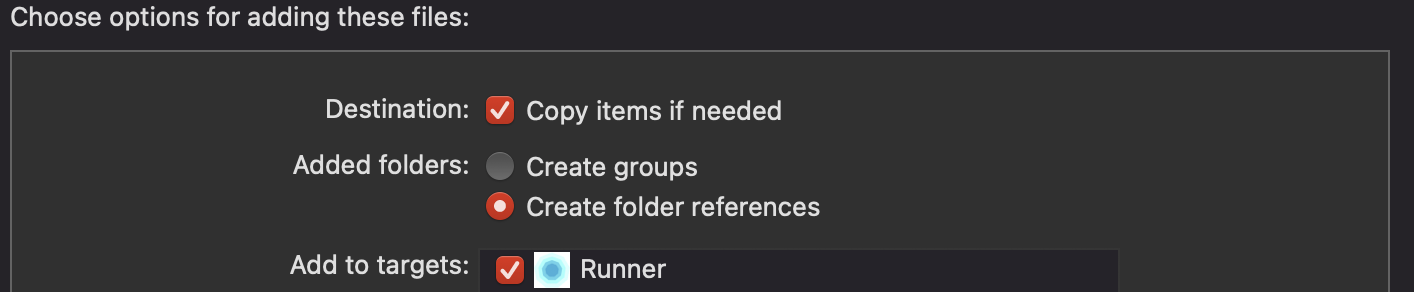
Right-click your Xcode project's root and add a New Group called Framework. This is where the frameworks will be added. When the group is created, drag and drop the dedicated extracted xcframework folders from Finder into the newly created group. A dialog will open, please select Copy items if needed, Create folder references and select the targets you want to add the Framework onto.
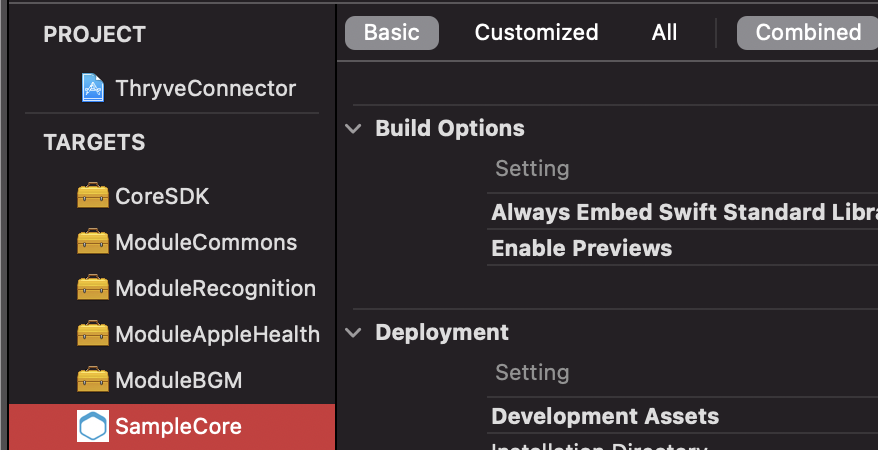
Following the import, the framework will appear in the left navigation hierarchy of the project.
Link framework
When the framework is added to the project, link it with the target. Select the project root > target > General:
Next, add the framework in the Embedded Binaries and Linked Frameworks and Libraries sections by clicking on the +-sign. Select for example the ThryveCore.xcframework in the appearing dialog.
If you have followed the import correctly, the screen should look like this depending on the imported frameworks:

Import framework
Now you should be able to import the dedicated reference in all classes.
Add Required Reason API
<?xml version="1.0" encoding="UTF-8"?>
<!DOCTYPE plist PUBLIC "-//Apple//DTD PLIST 1.0//EN" "http://www.apple.com/DTDs/PropertyList-1.0.dtd">
<plist version="1.0">
<dict>
    <key>NSPrivacyAccessedAPITypes</key>
    <array>
        <dict>
            <key>NSPrivacyAccessedAPITypeReasons</key>
            <array>
                <string>CA92.1</string>
            </array>
            <key>NSPrivacyAccessedAPIType</key>
            <string>NSPrivacyAccessedAPICategoryUserDefaults</string>
        </dict>
    </array>
</dict>
</plist>
The Thryve iOS SDK makes internally use of UserDefaults to store data. From 1st of May 2024, apps and third party SDKs must describe their use of required reason API like UserDefaults in their privacy manifest file otherwise they won’t be accepted by App Store Connect. For this reason you need to do the following:
- Create a privacy manifest file
- Add the entry "Privacy Accessed API Types" (or the key NSPrivacyAccessedAPITypes)
- Add the entry below "Privacy Accessed API Reasons" (or keyNSPrivacyAccessedAPITypeReasons) being an array containing CA92.1. More details can be found here
- Add another entry below first "Privacy Accessed API Type" (or the key NSPrivacyAccessedAPIType) and set the String to "User Defaults" (or the key NSPrivacyAccessedAPICategoryUserDefaults)
- The PrivacyInfo.xcprivacy plist file should look similar to the example on the right
Constructor
To use the library’s functionality, create a CoreConnector-object with the below described constructor. There are two different types of constructors. Depending on the usage of the partnerUserId-String, the getAccessToken()-method will create different results.
import ThryveCore

let connector = CoreConnector(
  appId: "FEh9HQNaa87cwdbB",
  appSecret: "NL7nTegPm5DKt8LrBZP62HQz6VNZaGuM",
  partnerUserId: "FVMW6fp9wnUxKnfekrQduZ96Xt6gemVk",
  language: "en"
)
| Code | Description |
|---|---|
| CoreConnnector(appId: String, appSecret: String, partnerUserId: String? = nil, language: String? = nil) | Creates a CoreConnector instance with mandatory and optional parameters. Parameters: • appId: The application code you received upon signing the cooperation as a String• appSecret: Your application secret you received upon signing the cooperation as a String• partnerUserID: An optional user ID, which allows Thryve to persistently relate a token to a user. If provided, Thryve will return the last valid accessToken previously created for this user instead of generating a new one e.g. FVMW6fp9wnUxKnfekrQduZ96Xt6gemVk |
Protecting appId and appSecret
Thryve recommends protecting the appId and appSecret used for creating the CoreConnector to prevent easy access via reverse engineering of the application. This has to happen on the application side and there are some best practices and recommendations to help you maintain the security of your application.
- Use Secure Storage Libraries: Consider using secure storage libraries or modules specifically designed for credential storage. Many programming languages and platforms offer built-in libraries for securely storing sensitive information, such as passwords and API keys, e.g. the Keychain services API.
- Encryption: Implement strong encryption algorithms to protect stored credentials. Ensure that you're using encryption methods that are widely recognized and considered secure within your development environment. There are tools and services providing automated protection, e.g. iXGuard.
- Avoid Hardcoding Credentials: Never hardcode credentials directly into your source code. Instead, use environment variables, configuration files, or other secure mechanisms to store and retrieve credentials. This prevents accidental exposure of sensitive information.
- Consider storing credentials remotely: Store the credentials remotely and fetch on demand from a service (which would require a stable internet connection) and optionally cache the data in the runtime memory. There are services like Firebase Remote Config or ConfigCat providing a easy solution.
- Regular Updates: Periodically review and update your credential storage mechanisms to incorporate the latest security practices and address any potential vulnerabilities.
- Security Audits and Testing: Conduct regular security audits and testing of your application to identify and rectify any security weaknesses or vulnerabilities.
- Security Education: Ensure that your development team is educated about security best practices, including credential management, to minimize the risk of security breaches.
- Consult Security Experts: If you have specific concerns or need more advanced security advice, consider consulting with security experts or hiring a cybersecurity professional to assess your application's security posture.
Generate a Thryve user
All data stored of any given end-user is linked to a pseudonymous Thryve user. This user is generated on backend side when calling the getAccessToken method. The method returns an accessToken, which is required for connecting data sources, uploading data or retrieving data for the user.
Additionally, you can set a unique identifier for the Thryve user. We call this the partnerUserID. Please ensure that the partnerUserID is an unguessable string generated e.g. through a hash-function. We suggest at least 32 digits, that may contain both digits, characters, and a dash „-„, as a special character. A partnerUserID can have a maximum length of 80 characters.
To set this unique identifier, please add the partnerUserID when calling the getAccessToken method. If an accessToken is returned, you defined your user’s partnerUserID successfully.
// completion handler
connector.getAccessToken(completionHandler: { response in
    if response.successful, let accessToken = response.data {
        // continue with other actions
    } else if let error = response.error {
        // error handling
    }
})

// async/await
let response = await connector.getAccessToken()
if response.successful, let accessToken = response.data {
    // continue with other actions
} else if let error = response.error {
    // error handling
}
| Code | Description |
|---|---|
| getAccessToken(completionHandler: @escaping (ThryveResponse<String>) -> Void) | Retrieves a new Thryve accessToken. If a partnerUserId was not previously set, it creates a new user. Otherwise, it will resend a corresponding accessToken for the existing user with the corresponding partnerUserID. |
| getAccessToken() async -> ThryveResponse<String> | Async/await variant of above function. |
| hasAccessToken(completionHandler: @escaping (Bool?) -> Void) | Returns true if an accessToken is available. If false call getAccessToken. |
| hasAccessToken() async -> Bool | Async/await variant of above function. |
| setAccessToken(_ accessToken: String) | This method should only be used when management for an access token of a user is handled by the app or as part of a completely external system on the customer's side. |
This method runs asynchronously and, when finished, returns ThryveResponse through the completion handler. Please check the code section on the right for an example response.
Display data source connection screen
Having received the accessToken for your user, the following method allows your user to connect their 3rd party devices via the data source screen url.
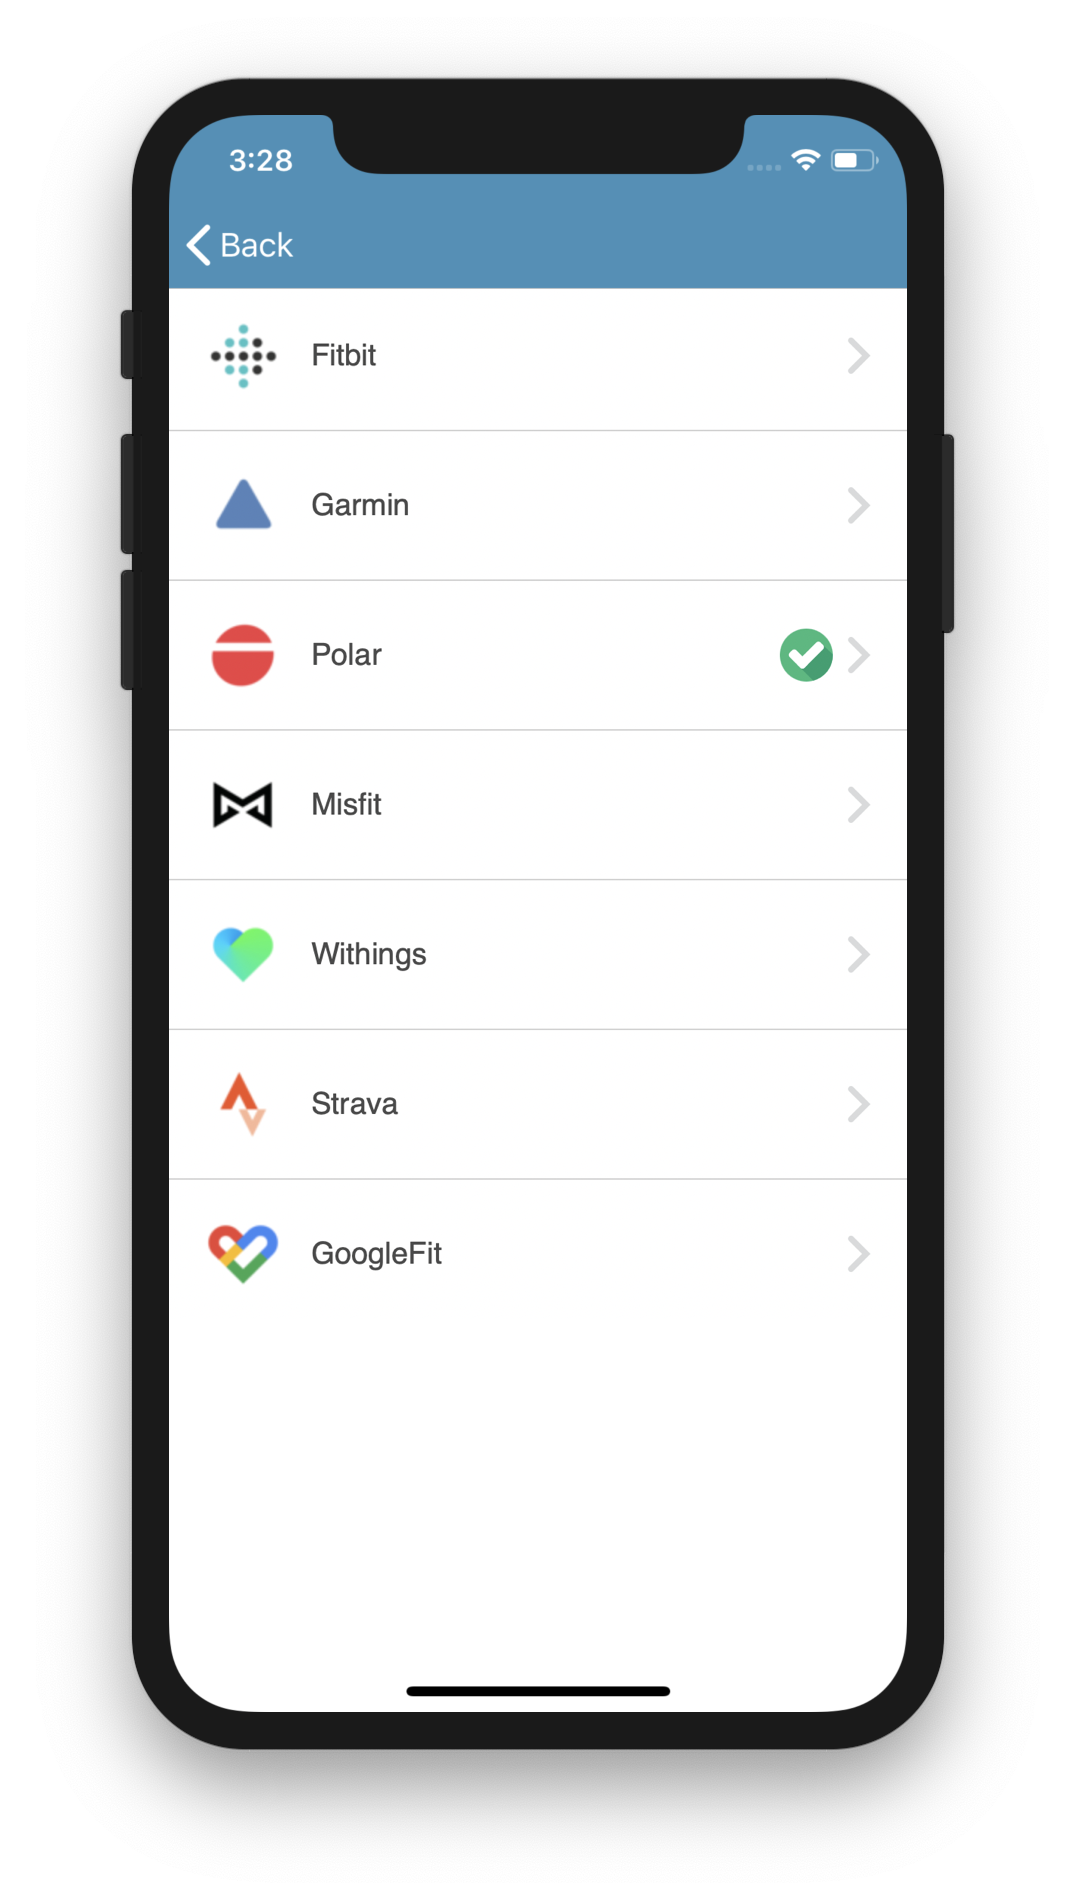
The Thryve data sources screen url should be opened in an external browser. An example implementation is displayed on the right.
// completion handler
connector.getDataSourceScreenUrl() { response in
    if response.successful, let url = response.data {
        UIApplication.shared.open(url + "&redirect_uri=example://redirect")
    } else if let error = response.error {
        // error handling
    }
}

// async/await
let response = await self.viewModel.connector.getDataSourceScreenUrl()
if response.successful, let url = response.data {
    UIApplication.shared.open(url + "&redirect_uri=example://redirect")
} else if let error = response.error {
    // error handling
}
| Code | Description |
|---|---|
| getDataSourceScreenUrl(completionHandler: (ThryveResponse<URL>) -> Void) | Requests a data source screen url to be presented to the user. |
| getDataSourceScreenUrl() async -> ThryveResponse<URL> | Async/await variant of above function. |
iOS extensions
The following chapter describes additional functionalities of the CoreSDK and modules. You can download the SDK framework files and the sample project in the above chapter.
CoreSDK: Custom data source connection
If you want your users to connect their data sources through your own customizable data source connection screen, you can use the SDK's direct connection and revoke functionality, where a dedicated URL will be generated. By providing the Thryve data source via the Tracker object, the authorization page of the corresponding data source will be displayed when opening this URL. Analogously, the revoke will take place, if the revoke URL will be accessed.
The implementation of generating those URLs can be accomplished by using the following SDK methods.
// completion handler
connector.getConnectDataSourceUrl(dataSourceId: source.id, redirectUrl: "showThryve://") { [weak self] (response) in
    guard
        response.succesful
        let url = response.data
    else {
        // handle error
        return
    }
    UIApplication.shared.open(url + "&redirect_uri=example://redirect")
}

// async/await
let response = await connector.getConnectDataSourceUrl(dataSourceId: source.id, redirectUrl: "showThryve://")
guard
    response.succesful
    let url = response.data
else {
    // handle error
    return
}
UIApplication.shared.open(url + "&redirect_uri=example://redirect")
| Code | Description |
|---|---|
| getConnectDataSourceUrl(dataSourceId: Int, redirectUrl: String?, completionHandler: @escaping (ThryveResponse<URL>) -> Void) | Requests a URL for a connection of the passed data source id and provides a completion handler returning the connection URL, which is supposed to be opened with the device's default browser. The optional redirectUrl is appended to the revoke data source url which allows deep-linking after revoking. |
| getConnectDataSourceUrl(dataSourceId: Int, redirectUrl: String?) async -> ThryveResponse<URL> | Async/await variant of above function. |
| getRevokeDataSourceUrl(dataSourceId: Int, redirectUrl: String?, requireUserAction: Bool = true, completionHandler: @escaping (ThryveResponse<URL>) -> Void) | Requests a URL for revoking a connection of the passed dataSourceId and provides a completion handler with the revoke URL, which is supposed to be opened with the device's default browser. The optional redirectUrl is appended to the revoke data source url which allows deep-linking after revoking. If requireUserAction is set to false the user does not need to confirm revoking. true by default. |
| getRevokeDataSourceUrl(dataSourceId: Int, redirectUrl: String?, requireUserAction: Bool = true) async -> ThryveResponse<URL> | Async/await variant of above function. |
For usage examples, please refer to the Xcode Sample project.
Deep-Linking
For better usability, users should be redirected directly back to the app after connecting the data source in an external browser. This can be achieved with the concept of Deep-Linking, where a custom redirect URL is utilized that is registered in your App.
In order to add this additional behavior to the Thryve redirection, this custom URL needs to be added at two places:
- With the additional parameter
redirect_uriin your direct connection respectively revoke URL, and - In your Thryve App settings for a comparison check.
Please also refer to the right code snippet.
CoreSDK: PartnerDataUpload
The PartnerDataUpload methods allows to upload custom data from the app to the Thryve data warehouse which is not data recorded by any data source. This might be a users demographic data like birthdate and gender or certain indications needed for health status calculation or other analytics of Thryve’s interpretation layer.
Data can be uploaded as DailyDynamicValue. You can access the data uploaded through the SDK like any other data via our API.
Health status/Interpretation layer data types
The following values are required for health status and interpretation layer analytics and need to be uploaded via the PartnerDataUpload:
DailyDynamicValue
let day = Date()
let payload = CustomerValue.CustomerPayload(value: "10", of: DataType(1000, .long), on: day)
let data = CustomerValue(data: [payload])

// completion handler
connector.uploadDailyDynamicValue(data: data) { response in
    if !response.successful, let error = response.error {
        // handle error
    }
    ...
}

// async/await
let response = await self.connector.uploadDailyDynamicValue(data: CustomerValue(data: [data]))
if !response.successful, let error = response.error {
    // handle error
}
| Code | Description |
|---|---|
| uploadDailyDynamicValue(data: CustomerValue, completionHandler: @escaping (ThryveResponse<Bool>) -> Void) | Uploads dynamic data CustomerValue for given day of date and type. Value is passed as String. Returns a ThryveResponse containing true as data in case of success, or false and optional ThryveError otherwise. |
| uploadDailyDynamicValue(data: CustomerValue) async -> ThryveResponse<Void> | Async/await variant of above function. |
Upload UserInformation
You can use the SDK to upload information on your users' height, weight, gender and birthdate which is used by certain evaluations to calculate more individual results, e.g. when calculating the MetabolicEquivalent.
let userInformation = UserInformation(height: 173, weight: 174.2, birthdate: "1990-01-18", gender: Gender.male)

// completion handler
connector.uploadUserInformation((userInformation: userInformation) { response in
  if (!response.successful) {
    // handle error
  }
  ...
}

// async/await
let result = await self.connector.uploadUserInformation(userInformation: userInformation)
if !result.successful, let error = result.error {
    // handle error
}
| Code | Description |
|---|---|
| uploadUserInformation(data: User, completionHandler: @escaping (ThryveResponse<Bool>) -> Void) | Uploads UserInformation. Returns a ThryveResponse containing a ThryveError in case of failure. |
| uploadUserInformation(userInformation: UserInformation) async -> ThryveResponse<Void> | Async/await variant of above function. |
Get UserInformation
You can retrieve user information directly with the CoreSDK, without the need to call the Wearable API. The function returns the same UserInformation being used when uploading data. Please refer to the code section for an example.
// completion handler
.connector.getUserInformation(completionHandler: { response in
    handleGetUserInformation(response: response)
})

// async/await
let response = await connector.getUserInformation()
handleGetUserInformation(response: response)
| Code | Description |
|---|---|
| getUserInformation(completionHandler: @escaping (ThryveResponse<UserInformation>) -> Void) | Retrieves UserInformation related to the current accessToken. The ThryveResponse contains error information in case of failure or data object UserInformation(authenticationToken: String, partnerUserID: String?, height: Int?, weight: Double?, birthdate: String?, gender: String?, connectedSources: [ConnectedSource]) • authenticationToken: Thryve access token (String)• partnerUserID: PartnerUserID (String)• height: Height in cm (Integer)• weight: Weight in kg (Double)• birthdate: Birth date String in YYYY-MM-dd format• gender: Gender from Gender, i.e. male, female, genderless• connectedSources: Array of ConnectedSource. ConnectedSource(dataSource: Int, connectedAt: String), whereas connectedAt is a String timestamp of the connection time and dataSource is the Thryve ID for the connected source. |
| getUserInformation() async -> ThryveResponse<UserInformation> | Async/await variant of above function. |
ThryveCore Error Codes
| Code | Name | Description |
|---|---|---|
| 1000 | CORE_UNKNOWN_ERROR | An unknown error occured. |
| 1001 | ACCESS_TOKEN_INVALID | No or invalid access token available. Call getAccessToken first. |
| 1002 | NO_INTERNET_CONNECTION | No internet connection available. |
| 1011 | DATA_TASK_ERROR | A data request failed. See errorMessage for details. |
| 1021 | INVALID_RESPONSE | A request returned an invalid response. See errorMessage for details. |
| 1031 | REQUEST_FAILED | A request failed. See errorMessage for details. |
| 1032 | REQUEST_FAILED_NO_DATA | Unexpectedly, a request returned no data. See errorMessage for details. |
| 1033 | REQUEST_FAILED_NO_DATA_TO_UPLOAD | Unexpectedly, a request was not provided with data to upload. See errorMessage for details. |
ThryveCore: Logging
 // In AppDelegate as an example
 import ThryveCore

    func application(
            _ application: UIApplication,
            didFinishLaunchingWithOptions launchOptions: [UIApplication.LaunchOptionsKey: Any]?
    ) -> Bool {
        ...

        // enabling Logger with debug mode
        Logger.enable(with : .debug)
        // adding additional logger writing log files into app documents
        Logger.addLogCommand({log in
            let fm = FileManager.default
            if let documentDirectory = try? fm.url(
                for: .documentDirectory, in: .userDomainMask, appropriateFor: nil, create: false) {
                let fileUrl = documentDirectory
                    .appendingPathComponent("thryve_log_".appending(
                        Date().thryveUtils.dayStart.thryveUtils.formatted(with: Date.ThryveUtils.yyyyMMdd)))
                    .appendingPathExtension("txt")
                // to make sure no logs are lost we need to target main. This should only happen for debug builds.
                DispatchQueue(label: "com.thryve.connector.DocumentsLogger", qos: .utility, target: .main).async {
                    if !fm.fileExists(atPath: fileUrl.path) {
                        fm.createFile(atPath: fileUrl.path, contents: nil)
                    }
                    do {
                        let handle = try FileHandle(forWritingTo: fileUrl)
                        if #available(iOS 13.4, *) {
                            try handle.seekToEnd()
                            try handle.write(contentsOf: log.data(using: .utf8)!)
                            try handle.write(contentsOf: "\n".data(using: .utf8)!)
                        } else {
                            handle.seekToEndOfFile()
                            handle.write(log.data(using: .utf8)!)
                            handle.write("\n".data(using: .utf8)!)
                        }
                        try handle.synchronize()
                        try handle.close()
                    } catch {
                        print("Failed appending to file \(fileUrl): \(error.localizedDescription)")
                    }
                }
            } else {
                print("Failed getting document directory!")
            }
        })
    }
The Core SDK provides a way to print logs generated by the Thryve SDK or forward them to a custom log output.
| Code | Description |
|---|---|
| enable(with verbosity: Verbosity) | Enables logging with a given verbosity which allows logs to be forwarded towards the system messages. The verbosity is one of the following values• Verbosity.error logs only errors.• Verbosity.warn logs errors and warnings.• Verbosity.info logs errors, warnings and info messages.• Verbosity.debug logs errors, warnings, info and debug messages.• Verbosity.verbose logs errors, warnings, info, debug and verbose messages. |
| addLogCommand(_ logCommand: @escaping LogCommand) | Allows adding additional LogCommand = (String) -> Void, e.g. forwarding logs to app documents file as shown in the example or to a remote service. |
AppleHealth: Integration
To integrate Apple’s HealthKit with your iOS app, you need to integrate the AppleHealth module of Thryve’s SDK. This will allow your users to connect with Apple Health and to automatically trigger a background routine to retrieve the latest health data.
Set your app's permission
<key>NSHealthShareUsageDescription</key>
<string>This app needs permission to share your health data</string>
<key>NSHealthUpdateUsageDescription</key>
<string>This app needs permission to update your health data</string>
To retrieve health data via Apple HealthKit with the Thryve SDK you need to following pemissions to your app's info.plist-file:
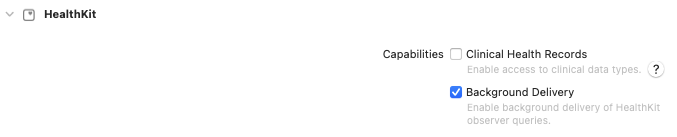
For further details checkout the code example on the right. In addition, you also need to add HealthKit in the entitlements list (Target → Signing & Capabilities → add (+) → HealthKit) of your app with "Background Delivery" enabled.
Start with the constructor
Before calling any method of the Apple Health module, please create the corresponding constructor.
import ModuleAppleHealth

let hKconnector = HKConnector()
| Code | Description |
|---|---|
| HKConnector() | Creates the HKConnector-object |
Check if Apple Health is available on the device
We recommend to use the isAvailable method at the beginning of every session before using any other methods to avoid errors. If Apple Health is not available all other methods will fail and result in errors.
| Code | Description |
|---|---|
| isAvailable: Bool | Checks if Apple Health is supported and available on the device. |
Check if Apple Health is already connected
// completion handler
connector.isActive() { response in
    if response.successful, let isActive = response.data {
        // work with isActive
    } else if let error = response.error {
        // handle error
    }
}

// async/await
let response = await viewModel.connector.isActive()
if response.successful, let isActive = response.data {
    // work with isActive
} else if let error = response.error {
    // handle error
}
The isActive method will return true if the user has an active Apple Health connection in the Thryve backend. If the method returns false, you need to ask your user to authorize data access for your app with the start method. We recommend to use this method before using any method for data retrieval to avoid errors.
| Code | Description |
|---|---|
| isActive(completionHandler: @escaping (ThryveResponse<Bool>) -> Void) | Checks if the Apple Health integration is active. |
| isActive() async -> ThryveResponse<Bool> | Async/await variant of above function. |
Get user authorization
// completion handler
connector.start(types: types) { response in
    if (response.successful) {
        // start synchronizing for example
    } else if let error = response.error {
        // handle error
    }

// async/await
let response = await connector.start(types: types)
if response.successful {
    // start synchronizing for example
} else if let error = response.error {
    // handle error
}
Before you can retrieve any data, your app needs to be authorized to access Apple Health data by your users. To get authorization, use the start method and the corresponding dialogue will be shown on top of your app.
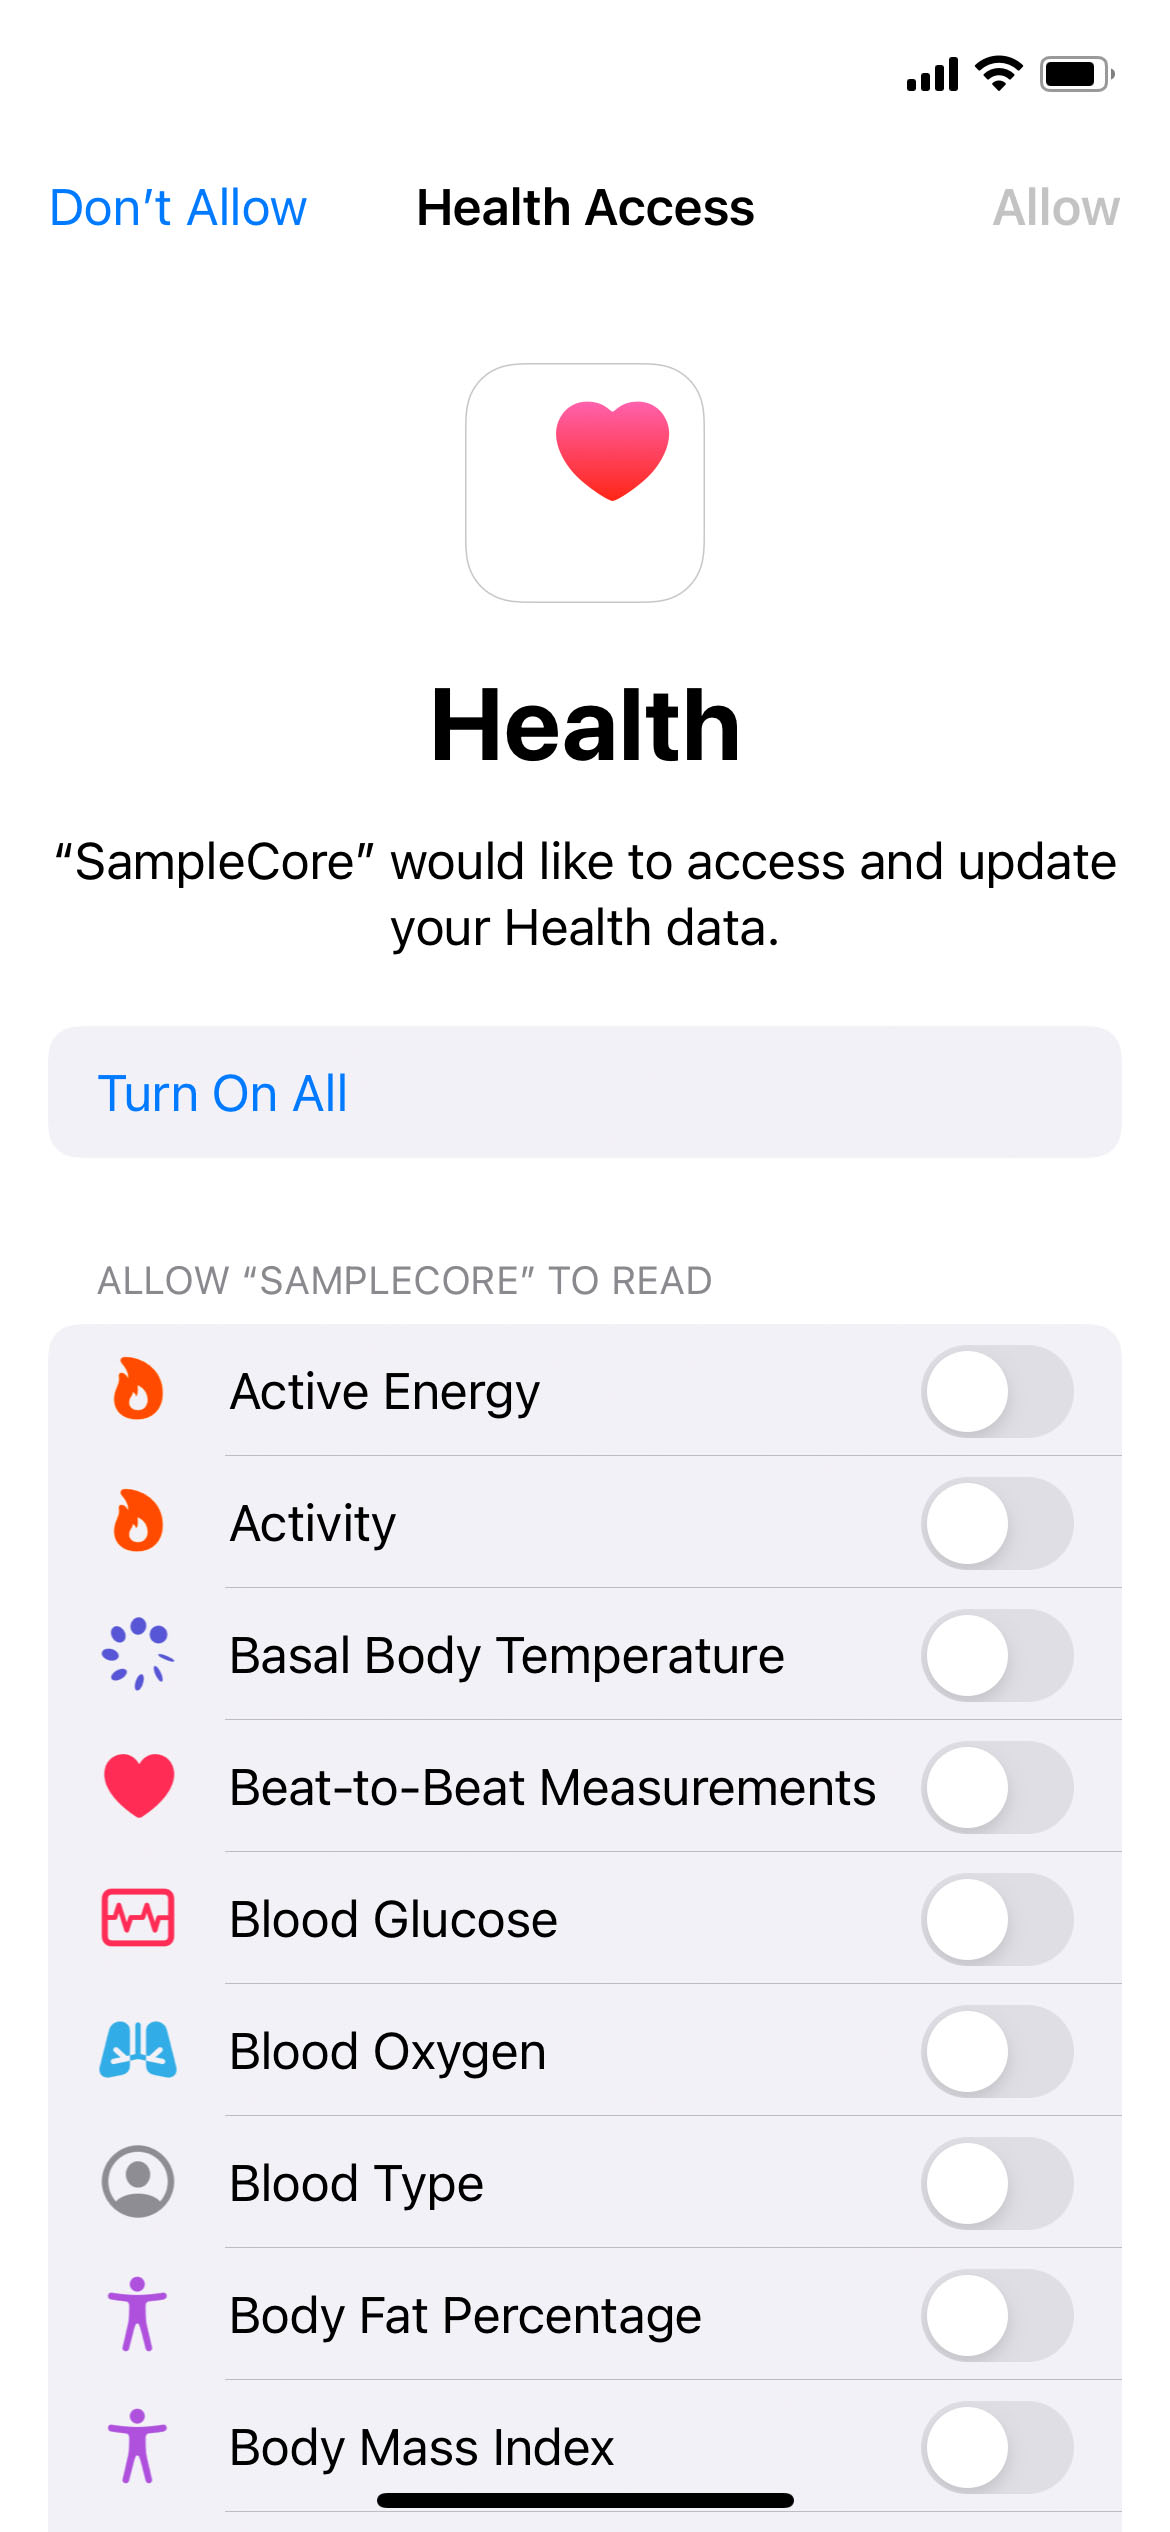
When using start specify the data you want to access by listing the corresponding HKObjectTypes.
| Code | Description |
|---|---|
| start(types: Set<HKObjectType>, completionHandler: @escaping (ThryveResponse<Bool>) -> Void) | Starts Apple Health integration, which creates a secure keychain storage for any necessary temporary data, sets up a connection to the Apple HealthKit interfaces, and performs a call for background delivery of data for the current app's session. To receive data beyond the current app session, check enableBackgroundDeliveryFor. |
| start(types: Set<HKObjectType>) async -> ThryveResponse<Void> | Async/await variant of above function. |
| stop(completionHandler: @escaping (ThryveResponse<Bool>) -> Void) | Stops Apple Health integration, can be called anytime. The method will notify the backend, where the connection will be revoked. isActive will return false. |
| stop() async -> ThryveResponse<Void> | Async/await variant of above function. |
AppleHealth: Data retrieval
To initiate the data retrieval, call the method start before as described above. If this method was called the module is able to fetch data through HealthKit until stop was called or the user revoked the authorization in the AppleHealth app.
Background data retrieval
    func application(_ application: UIApplication, didFinishLaunchingWithOptions launchOptions: [UIApplication.LaunchOptionsKey: Any]?) -> Bool {
        // Use any types you require or HKConnectorType.allTypes
        let types = [
            HKConnectorType.heartRate,
            HKConnectorType.stepCount
        ]
        //When apple's Health app decides to, it will wake your application through didFinishLaunchingWithOptions.
        //Once awoken, HealthKit waits a few seconds to see if said app wants to renew it's observing query contracts.
        //calling this method as early as possible renews those query contracts.
        HKConnector().enableBackgroundDeliveryFor(types: types)
        // Override point for customization after application launch.
        return true
    }
To enable background fetch (retrieving data when your app is closed or idle), call the enableBackgroundDeliveryFor method with the corresponding data types inside the didFinishLaunchingWithOptions method of AppDelegate. Apple requires the contained logic to be run in the first seconds of the app startup for data to be delivered, hence the AppDelegate position. It is not needed to wrap the method in an start call. Please refer to the sample code for more information.
For iOS 15 and watchOS 8 and onwards, you must enable the HealthKit Background Delivery by adding the com.apple.developer.healthkit.background-delivery entitlement to your app. If your app doesn’t have this entitlement, the enableBackgroundDelivery(for:frequency:withCompletion:) method fails with an HKError.Code.errorAuthorizationDenied error. Please refer to the official documentation for more information.
The background data retrieval for Apple Health reacts on "pings" the SDK receives from HealthKit itself. These pings come when new data is added to Apple Health and allow the SDK to directly retrieve it. The SDK does so by retrieving all data, both daily and epoch data, added to Apple Health since the last background or manual data retrieval.
The frequency on when HealthKit is sending pings to the SDK depends highly on the user's device, the user's app usage patterns and various other factors that are not transparent to app developers. You can find more information on data availability for native data sources here.
| Code | Description |
| enableBackgroundDelivery For(types: Set HKObjectType) |
Registers the SDK to receive background updates from HealthKit. This is called automatically after Start(), and must always be called in didFinishLaunchingWithOptions inside AppDelegate. |
Manual data retrieval
We recommend to use manual data retrieval methods to complement the background data retrieval as well as to retrieve historic data if required for you use-case.
The SDK allows you to trigger manual data retrieval using synchronize. This method will upload all data, both daily and epoch data, that was added to Apple Health since the last data retrieval. This includes data that was added retrospectively by delayed Wearable sync (e.g. the Apple Watch was not connected to the Smartphone for a few days), data coming from third party apps or manually created data entries by the user. When the synchronize method is called for the first time for a user, it will upload the data for today.
| Code | Description |
|---|---|
| synchronize(types: Set<HKObjectType>, completionHandler: ((ThryveResponse<Bool>) -> Void)? = nil) | Performs synchronization of daily and epoch data for the specified types added to Apple Health since the last upload. Call this function in order to synchronize data immediately. The optional parameter completionHandler reports the response of the synchronization. |
| synchronize(types: Set<HKObjectType>) async -> ThryveResponse<Void> | Async/await variant of above function. |
If your use-case requires for data recorded prior to the initial data sync after user authorization, the SDK provides methods to perform a backfill for historic timeframes. The methods will synchronize each epoch and daily data describing the provided timeframe.
| Code | Description |
|---|---|
| backfillEpoch(startDate: Date, endDate: Date, types: Set<HKObjectType>, completionHandler: ((ThryveResponse<Bool>) -> Void)? = nil) | Performs backfill of Epoch data for the given timeframe, with a maximum of 30 days. If the difference between startDate and endDate is more than 30 days, the SDK will count from the end date 30 days back. The optional parameter completionHandler reports the response of the synchronization. |
| backfillEpoch(startDate: Date, endDate: Date, types: Set<HKObjectType>) async -> ThryveResponse<Void> | Async/await variant of above function. |
| backfillDaily(startDate: Date, endDate: Date, types: Set<HKObjectType>, completionHandler: ((ThryveResponse<Bool>) -> Void)? = nil) | Performs backfill of Daily data for the given timeframe, with a maximum of 365 days. If the difference between startDate and endDate is more than 365 days, the SDK will count from the end date 365 days back. The optional parameter completionHandler reports the response of the synchronization. |
| backfillDaily(startDate: Date, endDate: Date, types: Set<HKObjectType>) async -> ThryveResponse<Void> | Async/await variant of above function. |
    hkconnector.backfillEpoch(startDate: from, endDate: to, types: HKConnectorType.allTypes) { (thryveReponse) in
      guard thryveReponse.successful else {
        //Looping through each ThryveError to process it
        thryveReponse.errors?.forEach{ thryveError in
          //Each error contains codes errorCode, [httpCode]
          Logger.e { "backfillEpoch ThryveError code: \(thryveError.errorCode)" }
           //Each error contains an optional errorMessage
          Logger.e { "backfillEpoch ThryveError code: \(thryveError.errorMessage)" }
           //Each error contains an optional MetaData? object that contains optional userMessage, dataSourceId, dataType associated with the error.
          Logger.e { "backfillEpoch ThryveError code: \(thryveError.metaData)" }
        }
        return
      }
      //backfillEpoch function was successful
      Logger.i { thryveReponse.successful }
    }
AppleHealth: Error codes of synchronize and backfill methods
| Code | Name | Description |
|---|---|---|
| 70000 | HK_UNKNOWN_ERROR | An unknown error occured. See errorMessage for details. |
| 70001 | HK_INITIALIZATION_ERROR | The HKConnector could not be initialized. See errorMessage for details. |
| 70002 | HK_AUTH_REQUEST_FAILED | The HealthKit authorization failed. See errorMessage for details. |
| 70003 | HK_CONNECTION_DISABLED | The HealthKit connection was not enabled yet. Call start first. |
| 70004 | HK_NOT_SUPPORTED | The device dies not support HealthKit. |
| 70005 | HK_TYPES_EMPTY | The provided types are empty. Provide at least one type. |
| 70006 | HK_NETWORK_HANDLER_FAILED | Failed to create a network handler. See errorMessage for details. |
| 70007 | HK_SYNC_DAILY_FAILED | Synchronize/backfill daily data has failed. See errorMessage for details. |
| 70008 | HK_SYNC_EPOCH_FAILED | Synchronize/backfill epoch data has failed. See errorMessage for details. |
| 70010 | HK_SYNC_START_AFTER_NOW | The start date set in backfillEpoch or backfillDaily is set as a date that is in the future. |
| 70011 | HK_SYNC_END_AFTER_NOW | The end date set in backfillEpoch or backfillDaily is set as a date that is in the future. |
| 70012 | HK_SYNC_END_BEFORE_START | The end date set in backfillEpoch or backfillDaily is set before the start date. |
| 70013 | HK_SYNC_DAILY_UPLOAD_FAILED | Uploading daily data has failed. See errorMessage and httpCode for details. |
| 70014 | HK_SYNC_EPOCH_UPLOAD_FAILED | Uploading epoch data has failed. See errorMessage and httpCode for details. |
| 70016 | HK_SYNC_IN_PROGRESS | A synchronization is not executed because it is already in progress, either started manually with synchronize or via background delivery. |
| 70020 | HK_MANAGER_INSTANCE_LOST | The internal HealthKit manager instance was lost unexpectedly. |
| 70030 | HK_STOP_FAILED | Failed to stop the HealthKit connection. See errorMessage for details. |
| 70101 | HK_DATA_UNAVAILABLE | Error mapping to HKError.Code.errorHealthDataUnavailable. |
| 70102 | HK_DATA_RESTRICTED | Error mapping to HKError.Code.errorHealthDataRestricted. |
| 70105 | HK_AUTH_NOT_DETERMINED | Error mapping to HKError.Code.errorAuthorizationNotDetermined. |
| 70106 | HK_DATABASE_INACCESSIBLE | Error mapping to HKError.Code.errorAuthorizationNotDetermined. |
| 70111 | HK_NO_DATA | Error mapping to HKError.Code.errorNoData. |
AppleHealth: Method parameters
| Name | Type | Description |
|---|---|---|
| types | Set <HKObjectType> | Set containing HKObjectType data types to be handled in HealthKit. |
| startDate | Date | The date which will be used as the starting point of a synchronization call. The time should never be later than the endDate or else the data retrieval will fail. |
| endDate | Date | The date which will be used as the end point of a synchronization call. The time should never exceed the current time of the device (the exact time this method is called) or else the data retrieval will fail. Please make sure to consider the timezone of the device when setting the time. |
Android integration
IMPORTANT NOTE
Android SDK 4.14.0 was built using Gradle 8.7, Android Gradle Plugin 8.6.0 and Kotlin 1.9.23. For more information see kotlinlang.org/docs/compatibility-modes. Also, please ensure that the compileSdkVersion must be at least 35.
There are two ways to integrate the Thryve Android SDK into your application:
As previously described, the CoreSDK provides all necessary methods to allow your users to establish a data sources connection with OAuth and Direct Access data sources. The different SDK modules are extensions to the SDK’s functionality with additional data retrieval routines. It is required to instantiate the CoreConnector when using any of the additional modules. The CoreSDK and all modules have separate constructors to set up the corresponding object instance needed to call the desired method.
Integration using Thryve repository dependencies
root build.gradle
allprojects {
    repositories {
        ...
        maven {
            url "https://nexus.external.thryve.de/repository/releases/"
            credentials {
                username = thryveUsername
                password = thryvePassword
            }
        }
        ...
    }
}
Thryve provides a private protected repository supporting the Maven repository format to retrieve the Thryve SDK build artifacts. In order to configure a Gradle project to resolve dependencies declared in build.gradle file, the Thryve repository has to be declared as shown.
Your username and password are the same as the ones you use in the Thryve API portal. To prevent them being pushed in your repositories, you can store those in the project’s local.properties or the user-global Gradle properties.
gradle.properties
thryveUsername=YOUR_THRYVE_PORTAL_USER
thryvePassword=YOUR_THRYVE_PORTAL_PASSWORD
When the repository was added you can add the dependencies depending on the features you need. It's important that you use api instead of implementation at least for core and commons so that they can be consumed by the other Thryve dependencies.
app build.gradle
buildscript {
    ext.thryve_sdk_version = "4.14.0"
    ...
}

dependencies {
    ...
    api "com.thryve.connector:core:${thryve_sdk_version}"
    api "com.thryve.connector:commons:${thryve_sdk_version}"
    api "com.thryve.connector:shealth:${thryve_sdk_version}"
    api "com.thryve.connector:gfit:${thryve_sdk_version}"
    api "com.thryve.connector:hconnect:${thryve_sdk_version}"
}
Integrating the .arr libraries
Thryve provides the Android Core SDK and module libraries as standard Android Archive (aar).
module build.gradle
...
  ...
  android {
    ...
    compileOptions {
      sourceCompatibility 1.8
      targetCompatibility 1.8
    }
    kotlinOptions {
        jvmTarget = 1.8
    }
  }
  ...
  dependencies {
    ...
    implementation "androidx.appcompat:appcompat:$appCompat"
    implementation "androidx.core:core-ktx:$androidXCore"

    // Referenced in project's build.gradle
    implementation 'org.jetbrains.kotlin:kotlin-stdlib-jdk7:$kotlin_version'

    implementation files('libs/thryve_core_sdk_4.14.0.aar')

    // CommonsModule import needed for other modules
    implementation files('libs/thryve_module_commons_4.14.0.aar')
    // Optional modules
    implementation files('libs/thryve_module_shealth_4.14.0.aar')
    implementation files('libs/thryve_module_gfit_4.14.0.aar')
    implementation files('libs/thryve_module_hconnect_4.14.0.aar')
    ...
    // dependencies for network and others
    implementation "com.google.code.gson:gson:$gson"
    implementation "io.github.reactivecircus.cache4k:cache4k:$cache4k"
    implementation "androidx.legacy:legacy-support-v4:$legacySupport"

    implementation "io.reactivex.rxjava2:rxjava:$rxJava"
    implementation "io.reactivex.rxjava2:rxandroid:$rxAndroid"
    implementation "io.reactivex.rxjava2:rxkotlin:$rxKotlin"
    implementation "io.github.reactivecircus.cache4k:cache4k:$cache4k"

    // dependencies for background sync (Google Fit, Samsung Health)
    implementation "androidx.work:work-runtime:$work"
    implementation "androidx.work:work-runtime-ktx:$work"
    implementation "androidx.work:work-gcm:$work"

    implementation "androidx.lifecycle:lifecycle-runtime-ktx:$lifecycle"
    implementation "androidx.lifecycle:lifecycle-process:$lifecycle"

    implementation "androidx.concurrent:concurrent-futures:$concurrentFutures"
    implementation "androidx.concurrent:concurrent-futures-ktx:$concurrentFutures"

    // dependencies for Google Fit
    implementation "com.google.android.gms:play-services-auth:$playServicesAuth"
    implementation "com.google.android.gms:play-services-fitness:$playServicesFitness"

    // dependencies for encryption/auth mechanisms
    implementation "androidx.security:security-crypto:$crypto"
  }
buildscript {
    ext.androidXCore = "1.12.0"
    ext.appCompat = "1.6.1"
    ext.annotation ="1.7.1"
    ext.cache4k = "0.13.0"
    ext.crypto = "1.1.0-alpha06"
    ext.concurrentFutures = "1.1.0"
    ext.gradlePlugin = "8.6.0"
    ext.gson = "2.10.1"
    ext.kotlinPlugin = "1.9.23"
    ext.legacySupport = "1.0.0"
    ext.lifecycle = "2.7.0"
    ext.playServicesLocation = "21.2.0"
    ext.playServicesWearable = "18.1.0"
    ext.playServicesFitness = "21.1.0"
    ext.playServicesAuth = "21.0.0"
    ext.rxAndroid2 = "2.1.1"
    ext.rxJava2 = "2.2.21"
    ext.rxKotlin = "2.4.0"
    ext.sdkVersion = "4.14.0"
    ext.work = "2.9.0"
    ...
}
Add library file
The versions as of May 2022 which can be put to the project or app build.gradle file:
- Add the dedicated aar-file to a folder of your project (e.g. libs)
- Add implementation files('libs/
.aar') to your build.gradle file - Add Kotlin support with annotation processing
- Add support for Android AppCompat-Library
- Add target and source compatibility for Java 1.8
- Add Jvm target for kotlin to version 1.8
- For further information please refer to the example build.gradle-script on the right. If CommonsModule is added, add packagingOptions accordingly
Create the constructor
To use the library’s functionality, create a CoreConnector-object with the below described constructor. There are two different types of constructors. Depending on the usage of the partnerUserId-String, the getAccessToken()-method will create different results.
// Application, Activity or Service Android Context
val context: Context = this

val appId: String = "FEh9HQNaa87cwdbB"
val appSecret: String = "NL7nTegPm5DKt8LrBZP62HQz6VNZaGuM"

// Connector object without partnerUserId
val connector = CoreConnector(context, appId, appSecret)

val partnerUserId: String = "FVMW6fp9wnUxKnfekrQduZ96Xt6gemVk"

// Connector object with partnerUserId
val connector = CoreConnector(context, appId, appSecret, partnerUserId)

val language: String = "en"

// Connector object with partnerUserId
val connector = CoreConnector(context, appId, appSecret, partnerUserId, language)
| Code | Description |
|---|---|
| CoreConnector(Context context, String appId, String appSecret) | Creates the CoreConnector-object when using the following correct parameters: • context: Default Android Context• appId: The application code you received upon signing the cooperation as a String• appSecret: Your application secret you received upon signing the cooperation as a String |
| CoreConnector(Context context, String appId, String appSecret, @Nullable String partnerUserId) | Creates the CoreConnector-object in the same way as the above constructor, but with a partnerUserId. Additional Parameter: • partnerUserId: A user ID, which allows Thryve to persistently relate a token to a user. If provided, Thryve will return the last valid accessToken previously created for this user instead of generating a new one e.g. FVMW6fp9wnUxKnfekrQduZ96Xt6gemVk |
| CoreConnector(Context context, String appId, String appSecret, @Nullable String partnerUserId, @Nullable String language) | Creates the CoreConnector-object in the same way as the above constructor, but with a user related language. Additional Parameter: • language: Optionally determines the language setting for the corresponding user. Will be set as a string of the country code, e.g.: en. We currently support five languages: English, German, Spanish, French and Italian. If not set, the default partner language will be used. |
Protecting appId and appSecret
Thryve recommends protecting the appId and appSecret used for creating the CoreConnector to prevent easy access via reverse engineering of the application. This has to happen on the application side and there are some best practices and recommendations to help you maintain the security of your application.
- Use Secure Storage Libraries: Consider using secure storage libraries or modules specifically designed for credential storage. Many programming languages and platforms offer built-in libraries for securely storing sensitive information, such as passwords and API keys, e.g. the Android Keystore system.
- Encryption: Implement strong encryption algorithms to protect stored credentials. Ensure that you're using encryption methods that are widely recognized and considered secure within your development environment. There are tools and services providing automated protection, e.g. DexGuard.
- Avoid Hardcoding Credentials: Never hardcode credentials directly into your source code. Instead, use environment variables, configuration files, or other secure mechanisms to store and retrieve credentials. This prevents accidental exposure of sensitive information.
- Consider storing credentials remotely: Store the credentials remotely and fetch on demand from a service (which would require a stable internet connection) and optionally cache the data in the runtime memory. There are services like Firebase Remote Config or ConfigCat providing a easy solution.
- Regular Updates: Periodically review and update your credential storage mechanisms to incorporate the latest security practices and address any potential vulnerabilities.
- Security Audits and Testing: Conduct regular security audits and testing of your application to identify and rectify any security weaknesses or vulnerabilities.
- Security Education: Ensure that your development team is educated about security best practices, including credential management, to minimize the risk of security breaches.
- Consult Security Experts: If you have specific concerns or need more advanced security advice, consider consulting with security experts or hiring a cybersecurity professional to assess your application's security posture.
Generate a Thryve user
All data stored of any given end-user is linked to a pseudonymous Thryve user. This user is generated on backend side when calling the getAccessToken method. The method returns a ThryveResponse holding the access token as data, which is required for connecting data sources, uploading data or retrieving data for the user.
Additionally, you can set a unique identifier for the Thryve user. We call this the partnerUserID. Please ensure that the partnerUserID is an unguessable string generated e.g. through a hash-function. We suggest at least 32 digits, that may contain both digits, characters, and a dash „-„, as a special character. A partnerUserID can have a maximum length of 80 characters.
To set this unique identifier, please add the partnerUserID when creating the CoreConnector. If an access token is returned, you defined your user’s partnerUserID successfully.
// Must be called in background thread to avoid NetworkOnMainThreadException
val thryveResponse = connector.getAccessToken()

if (thryveResponse.successful) {
    token = thryveResponse.data
} else {
    // process thryve thryveResponse.error
}
| Code | Description |
|---|---|
| fun getAccessToken(): ThryveResponse<String> | Retrieves a new Thryve access token as part of ThryveResponse.data. If a partnerUserId was not previously set, it creates a new user and access token on each call. Otherwise, it will return an existing access token for the existing user with the corresponding partnerUserID. |
| fun hasAccessToken(): Boolean | Checks whether there is a locally stored access token for the CoreConnector's partnerUserId (if set). |
| fun setAccessToken(value: String): ThryveResponse<Boolean> | This method should only be used when management for an access token of a user is handled by the app or as part of a completely external system on the customer's side. |
Retrieve and display the data sources connection screen
If you have received the access token for your user, the following method allows your user to connect their 3rd party data providers via the data source connection screen.
The Thryve data sources selection URL can be obtained by calling the method below and can be opened in a browser or WebView. Due to security reasons, some third party sources or sign-in methods, like some social log-ins, aren't fully compatible with WebViews, so we are phasing out support for them.
Observable
    .fromCallable {
        // get the data sources connection screen URL
        connector.getDataSourceScreenUrl()
    }
    .subscribeOn(Schedulers.io())
    .observeOn(AndroidSchedulers.mainThread())
    .subscribe({ response ->
        if (response.succesful) {
            // start an intent typically opening the device browser
            val browserIntent = Intent(
                Intent.ACTION_VIEW,
                Uri.parse("$url&redirect_uri=<your redirect uri getting back to your app>")
                )
            startActivity(browserIntent)
        } else {
            // process thryveResponse.error
        }

    }, {
        // handle any thrown error here
    })
    .dispose()
| Code | Description |
|---|---|
| ThryveResponse<String> getDataSourceScreenUrl() | Generates a URL that, when opened in a browser, will display a web sources connection UI linked to the active user in the CoreConnector (valid for one hour). |
Android extensions
The following chapter describes additional functionalities of the CoreSDK and modules. You can download the SDK framework files and the sample project in the above chapter.
CoreSDK: Custom data source connection
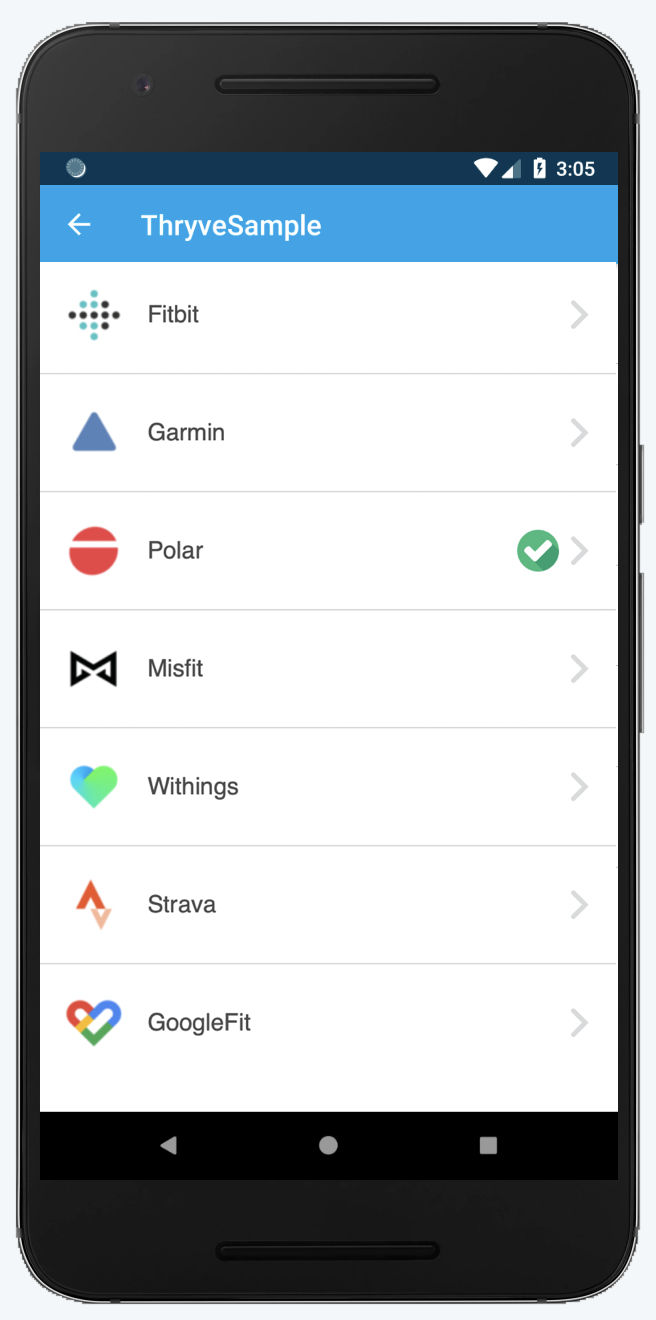
If you want your users to connect their data sources through your own customizable data source connection screen, you can use the SDK's direct connection and revoke functionality, where a dedicated URL will be generated. By providing the Thryve data source ID, the authorization page of the corresponding data source will be displayed when opening this URL (e.g. ID 1 will show the connection page for Fitbit). Analogously, the revoke will take place, if the revoke URL will be accessed.
The implementation of generating those URLs can be accomplished by using the following SDK methods.
Observable
    .fromCallable {
        // get the direct connection URL
        connector.getConnectDataSourceUrl(selectedDataSource)
    }
    .subscribeOn(Schedulers.io())
    .observeOn(AndroidSchedulers.mainThread())
    .subscribe({ response ->
        if (response.succesful) {
            // start an intent typically opening the device browser
            val browserIntent = Intent(
                Intent.ACTION_VIEW,
                Uri.parse("$url&redirect_uri=example://redirect")
                )
            startActivity(browserIntent)
        } else {
            // process thryveResponse.error
        }, {
      // handle any thrown error here
    })
    .dispose()
| Code | Description |
|---|---|
| fun getConnectDataSourceUrl(dataSourceId: Int, redirectUri: String? = null): ThryveResponse<String> | Requests a URL for a connection of the passed data source ID, which is supposed to be opened with the device's default browser. • dataSourceId: integer based data source ID (e.g. 1 for Fitbit)• redirectUri: Optional redirect url appended to the revoke data source url which allows deep-linking after connecting. Returns a ThryveResponse containing the url as data in case of success, or an error otherwise. |
| fun getRevokeDataSourceUrl(dataSourceId: Int, redirectUri: String? = null, requireUserAction: Boolean = true): ThryveResponse<String> | Requests a URL for revoking a connection of the passed data source ID, which is supposed to be opened with the device's default browser. • dataSourceId: integer based data source ID (e.g. 1 for Fitbit)• redirectUri: Optional redirect url appended to the revoke data source url which allows deep-linking after revoking.• requireUserAction: Optional flag if data source should be revoked with user interaction or instantly. Default is |
For usage examples, please refer to the ThryveSample Android Studio project.
Deep-Linking
For better usability, users should be redirected directly back to the app after connecting the data source in an external browser. This can be achieved with the concept of Deep-Linking, where a custom redirect URL is utilized that is registered in your App.
In order to add this additional behavior to the Thryve redirection, this custom URL needs to be added at two places:
- With the additional parameter
redirect_uriin your direct connection respectively revoke URL, and - In your Thryve App settings for a comparison check.
CoreSDK: PartnerDataUpload
The PartnerDataUpload methods allows to upload custom data from the app to the Thryve data warehouse which is not data recorded by any data source. This might be a users demographic data like birthdate and gender or certain indications needed for health status calculation or other analytics of Thryve’s interpretation layer.
Data can be uploaded as DailyDynamicValue.
Health status/Interpretation layer data types
The following values are required for health status and interpretation layer analytics and need to be uploaded via the PartnerDataUpload:
DailyDynamicValue
val date: Date = new Date();
val dailyDynamicValueType: Int = 5020;
val value: Long = 70.5;

// Must be called in background thread to avoid NetworkOnMainThreadException
val thryveResponse = connector.uploadDailyDynamicValue(date, dailyDynamicValueType, value);
// process thryveResponse
| Code | Description |
|---|---|
| fun uploadDailyDynamicValue(date: Date, type: Int type, value: Any): ThryveResponse<Boolean> | Uploads a daily dynamic value for a given day (date) and type. For types please check the Biomarkers documentation. Returns a ThryveResponse containing true as data in case of success, or false otherwise. |
CoreSDK: Upload UserInformation
You can upload user information like height, weight, gender and others with the CoreSDK. The function returns a ThryveResponse containing true as data in case of success, or false otherwise. Please refer to the sample code section for further details.
// Must be called in background thread to avoid NetworkOnMainThreadException
val user = new User(173, 74.2, "1990-01-18", Gender.MALE);
val thryveResponse = connector.uploadUserInformation(user);
// process thryveResponse
| Code | Description |
|---|---|
| fun uploadUserInformation(user: User): ThryveResponse<Boolean> | Uploads user information for the given user object: public User(int height, double weight, String birthdate, Gender gender) • height: Height in cm (Integer)• weight: Weight in kg (Double)• birthdate: Birth date String in YYYY-MM-dd format• gender: Gender from enum, i.e. MALE, FEMALE, GENDERLESS and returns ThryveResponse containing true as data in case of sucess, or false otherwise. |
CoreSDK: Get UserInformation
You can retrieve user information directly with the CoreSDK, without the need to call the Wearable API. The function returns a ThryveResponse containing the UserInformation of the given user as data. Please refer to the sample code section for further details.
// Must be called in background thread to avoid NetworkOnMainThreadException
val thryveResponse = connector.getUserInformation();
if (thryveResponse.successful) {
    userInformation = thryveResponse.data
} else {
    // process thryve thryveResponse.error
}
| Code | Description |
|---|---|
| getUserInformation(): ThryveResponse<UserInformation> | Retrieves a UserInformation object: public UserInformation(String authenticationToken, String partnerUserID, int height, double weight, String birthdate, Gender gender, List • authenticationToken: Thryve access token (String)• partnerUserID: PartnerUserID (String)• height: Height in cm (Integer)• weight: Weight in kg (Double)• birthdate: Birth date String in YYYY-MM-dd format• gender: Gender from Enum, i.e. MALE, FEMALE, GENDERLESS• connectedSources: List of connected sources as defined in ConnectedSource(String connectedAt, int dataSource), whereas connectedAt is a String timestamp of the connection time and dataSource is the Thryve ID for the connected source. |
CoreSDK: Logging
The Core SDK provides a way to print and process logs generated by the Thryve SDK. They are logged in the Android system messages (readable by Logcat) and optionally also can be processed by a custom implementation, e.g. sending it to any remote log system.
| Code | Description |
|---|---|
| fun init(verbosity: Verbosity = Verbosity.WARN, logProcessors: List |
Initializes the Logger which allows logs to be forwarded towards the Android system messages (readable by Logcat) or an optional list of custom ThryveLogProcessors. The verbosity is one of the following values• Verbosity.ERROR logs only errors.• Verbosity.WARN logs errors and warnings.• Verbosity.INFO logs errors, warnings, and information messages.• Verbosity.DEBUG logs errors, warnings, information and debug messages.• Verbosity.VERBOSE logs all messages including network requests. |
| fun enable(enable: Boolean) | En/disables the logging. |
| fun setVerbosity(verbosity: Verbosity) | Changes the verbosity as described for the init function. |
When enabling logging this will allow you to view the logs that the Thryve SDK outputs to the console and use them for analysis or customer support requests.
 // In Application onCreate

 // Initialization with logging to the Android system messages only (readably via Logcat)
 Logger.init(Logger.Verbosity.DEBUG)

 // Initialization with custom log processors
 Logger.init(Logger.Verbosity.DEBUG, listOf(ThryveSentryProcessor(this), CustomProcessor(), ...))

...

class ThryveSentryProcessor(val context: Context) : ThryveLogProcessor {

    ...

    override val identifier: String
        get() = ThryveSentryProcessor::class.java.simpleName

    ...

    override fun process(level: Int, tag: String?, msg: String?, throwable: Throwable?) {
        if (throwable != null && level == Log.ERROR) {
            Sentry.captureException(throwable, "$msg")
        } else {
            if (level != Log.WARN && level != Log.ERROR) {
                Sentry.addBreadcrumb("$tag::" + (msg ?: throwable?.localizedMessage ?: throwable?.message ?: return))
            } else {
                Sentry.captureMessage(
                    "$tag " + (msg ?: throwable?.localizedMessage ?: throwable?.message ?: return),
                    when (level) {
                        Log.WARN -> SentryLevel.WARNING
                        Log.ERROR -> SentryLevel.ERROR
                        else -> return
                    }
                )
            }
        }
    }
ThryveLogProcessor
The Thryve SDK provides an ThryveLogProcessor interface which can be used to implement custom processors allowing you for example to send the logs to a remote log system like Sentry or writing the logs to a locally persisted file. Implementing the interface requires overriding the following method value:
| Code | Description |
|---|---|
| val identifier : String | This unique identifier is used to identify the registered processor when processing or removing processors. |
| fun process(date: Date, verbosity: Logger.Verbosity, tag: String?, msg: String?, throwable: Throwable? = null) | When an event is received, the SDK's internal logging tool invokes this method. The processor should parse the parameters and treat them properly. |
Source Logging
        // In Application onCreate
        SourceLogger.enable(true)
        SourceLogger.addLogProcessor(DocumentsLogProcessor(
            applicationContext,
            Source.GFIT_NATIVE.name,
            "thryve_log_" + Source.GFIT_NATIVE.name.lowercase() + "_"
        ))
Additionally to the Core SDK logging the Thryve SDK allows to log detailed native source related information via a SourceLogger class for Google Fit Native. To enable native source logging, the SourceLogger method enable needs to be called and a DocumentsLogProcessor or a custom ThryveLogProcessor as described above needs to be added. For more details see the code example in this section or the sample app. When using the DocumentsLogProcessor the logs can be found in the device's Documents directory.
CoreSDK Error Codes
| Code | Name | Description |
|---|---|---|
| 1000 | UNKNOWN_ERROR | An unknown error. |
| 1001 | ACCESS_TOKEN_INVALID | Missing or invalid access token. See Generate a Thryve user token. |
| 1002 | NO_NETWORK_CONNECTION | Error in case of missing network connection. |
| 1031 | REQUEST_FAILED | A request failed. See message or throwable for details. |
| 1032 | REQUEST_PAYLOAD_ERROR | A request payload failed to be created. See message or throwable for details. |
| 1033 | USER_INFORMATION_NULL_EMPTY | Returned user information was unexpectedly null or empty. |
| 1034 | RESPONSE_PARSING_ERROR | Request response failed parsing. See message or throwable for details. |
SHealth: Integration
private fun toggleSHealthIntegration() {
    if (!sConnector?.isActive()) {
        sHealthPermissions = SHealthDataType.values().asList()
        sConnector?.authorize(this, sHealthPermissions, { granted ->
            if (granted) {
                sConnector?.start(sHealthPermissions) {
                    showMessage("SHealthModule start result: ${it.data}")
                }
            } else {
                showMessage("SHealthModule not authorized")
            }
        }, { e ->
            showMessage("Error: ${e.message}")
            sConnector?.stop {
                showMessage("SHealthModule stop result: ${it.data}")
            }
        })
    } else {
        sConnector?.stop {
            showMessage("SHealthModule stop result: ${it.data}")
        }
    }
}
To integrate Samsung Health with your Android app, you need to add the SHealth module of Thryve’s SDK. This will allow your users to connect with Samsung Health and automatically trigger a background routine to retrieve the latest health data.
Initiate the Android WorkManager
class App : Application, Configuration.Provider {
    override fun getWorkManagerConfiguration() =
            Configuration.Builder()
                    .setMinimumLoggingLevel(Log.VERBOSE)
                    .build()
The scheduling behaviour of the synchronization service of the Samsung Health SDK module requires the custom configuration and initialization of the Android WorkManager Make sure to use the WorkManagerInitializer in your Application class by implementing Configuration.Provider. Please refer to the Kotlin/Java code sample on the right side of the documentation for guidance.
Create the constructor object
Before calling any method of the SHealth module, please create the corresponding constructor object.
import com.thryve.connector.shealth.SHealthConnector

sHealthConnector = SHealthConnector(context, requestedTypes);
| Code | Description |
|---|---|
| SHealthConnector(private val context: Context, connectedTypes: List |
Creates the SHealthConnector object. |
Check if Samsung Health is available on the device
We recommend to use the isAvailable method at the beginning of every session before using any other methods to avoid errors. If Samsung Health is not available all other methods will fail and result in errors.
| Code | Description |
|---|---|
| isAvailable: Boolean | Checks if the device supports Samsung Health (if Samsung Health app is installed and is available to the Thryve SDK). |
Check if Samsung Health is already connected
The isActive() method will check if the start method was called successfully and if the connection is still active. If the method returns false, you trigger the connection by using the start method. We recommend to use this method before using any method for data retrieval to avoid errors.
| Code | Description |
|---|---|
| fun isActive(): Boolean | Checks if SHealth integration is active. Can be used for app internal logic or user feedback for GUIs etc. |
Get user authorization
Before you can retrieve any data, your app needs to be authorized to access Samsung Health data by your users. To get authorization, use the start method and the corresponding dialogue will be shown on top of your app. You should do authorization via start method only because the previously used authorize method is deprecated since version 4.12.5
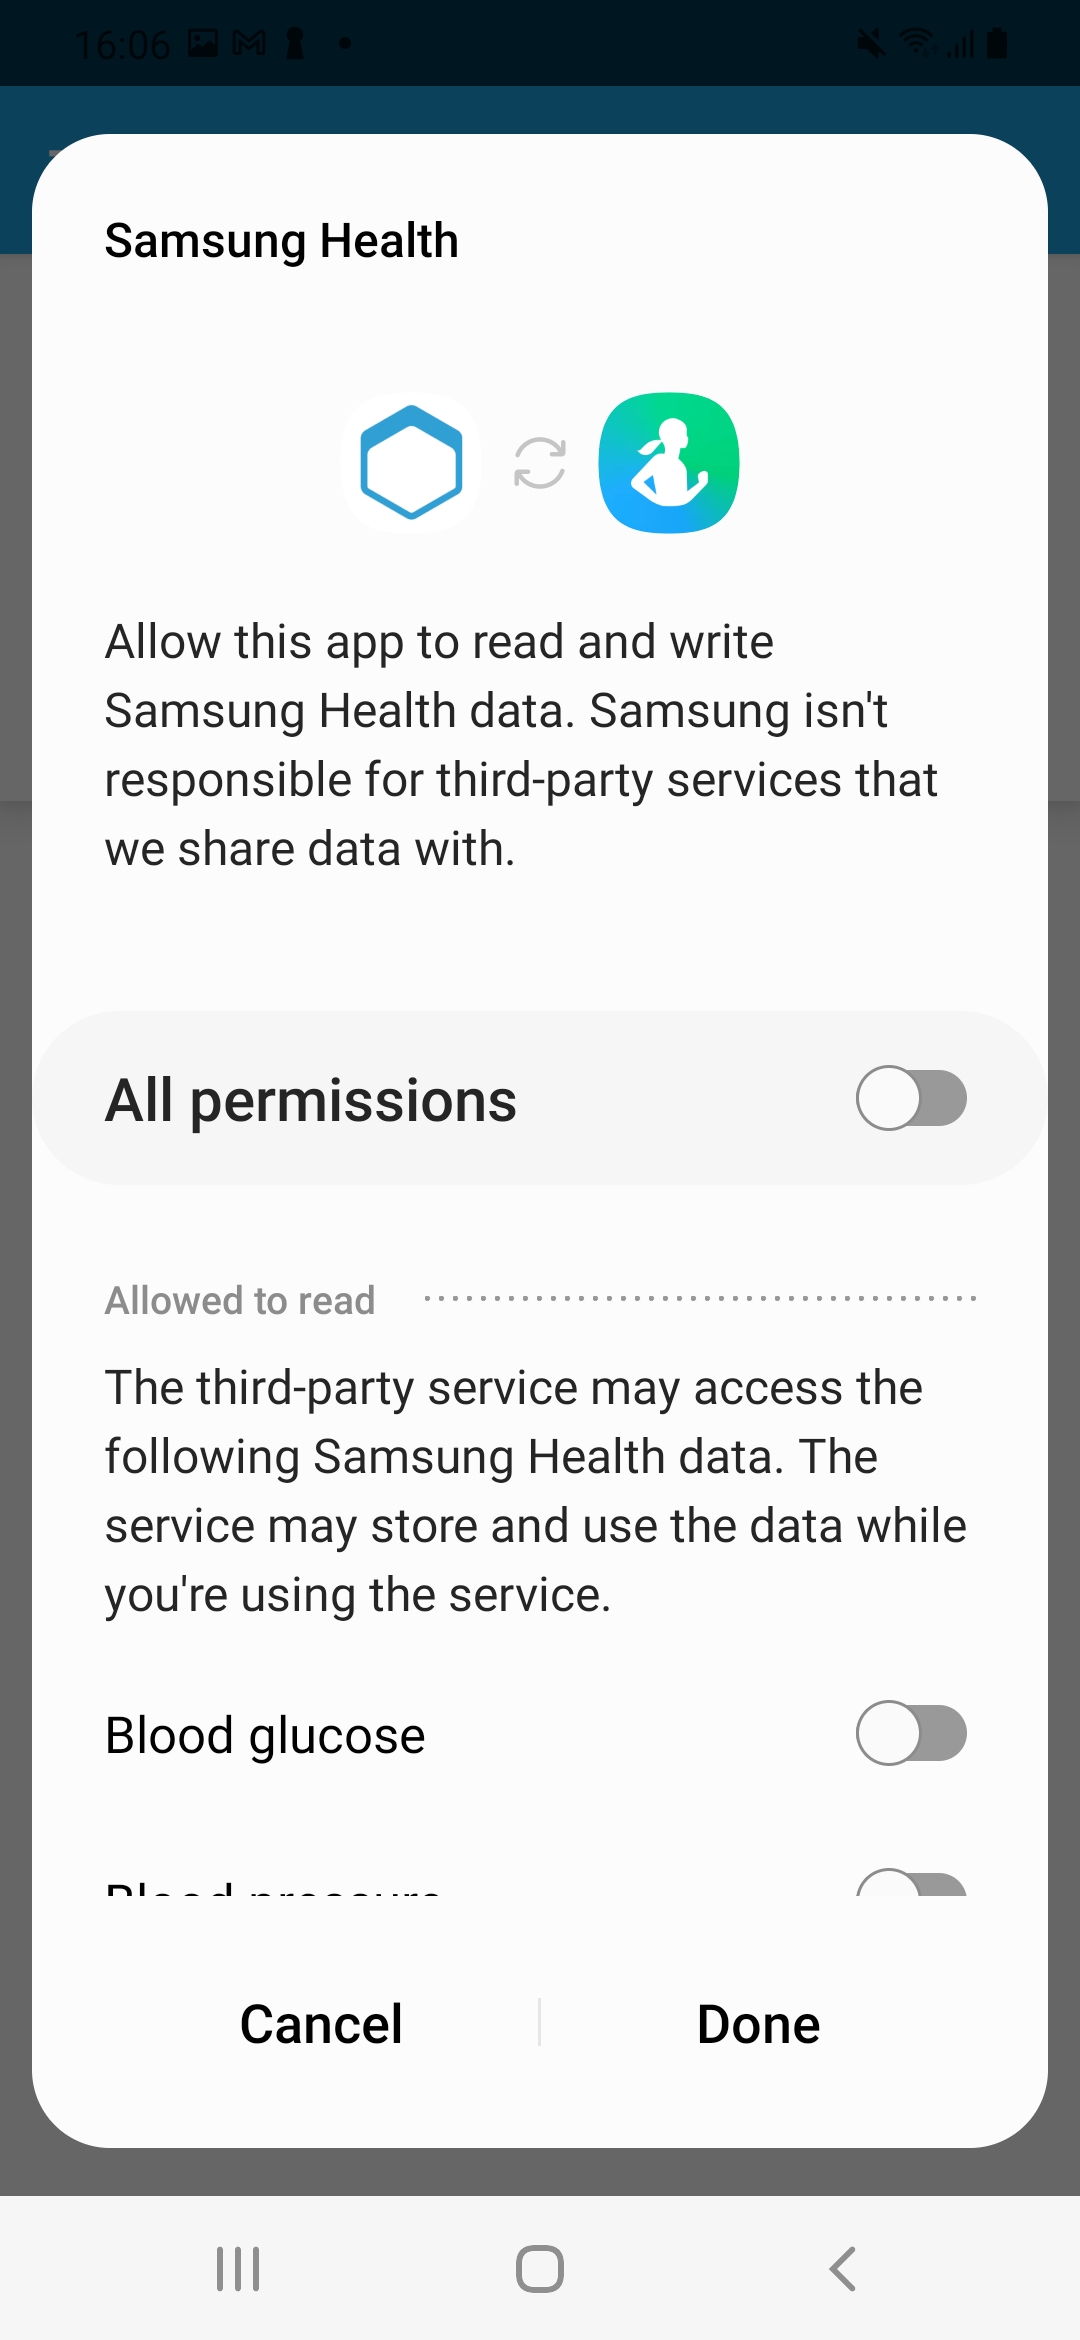
When using start specify the data you want to access by listing the corresponding SHealthDataType. Only if the user grants permission to access the data, any data retrieval can be performed.
| Code | Description |
|---|---|
| fun start(types: List |
Starts the Samsung Health service data retrieval and upload service with a list of SHealthDataTypes. Samsung Health authorization is done before starting the service. It is accompanied with a callback for further details. |
Check for authorization status
Samsung Health allows developers to understand if the user has granted access to Samsung Health data and for what data types. We recommend to use this method before retrieving health data to check if the permissions are still active and to ensure permissions for the requested data types are granted.
| Code | Description |
|---|---|
| fun arePermissionsAcquired(): Boolean? | Checks whether a user has granted permission to access one or more data types. |
| fun getAcquiredPermissions(): List |
Returns a list (with 0 to N values) of data types the user has currently granted access to via the Shealth Permission Manager. Checks which permissions from the current permission set are considered acquired by the Shealth Permission Manager. If the permission check request failes, null will be returned. |
If the method arePermissionsAcquired returns false or getAcquiredPermissions does not return a data type you want access to, please instruct your user to manually grant access in the Samsung Health app. This is needed as the permission screen dialogue can only be requested once for each data type.
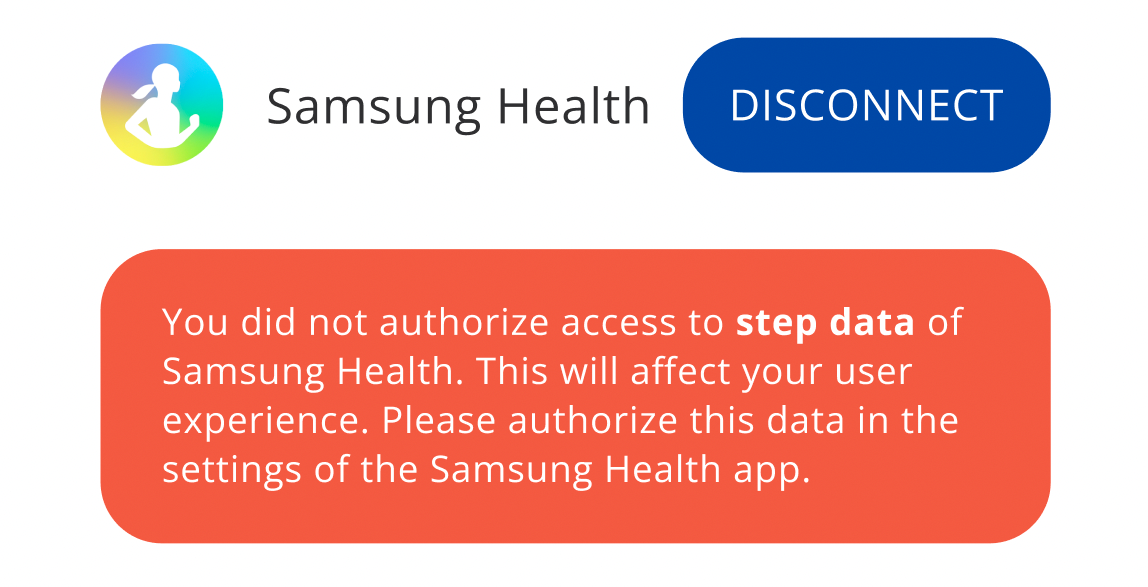
Example of informing user about missing
authorization of SHealthPermission
SHealth: Data retrieval
To authorize and initiate the data retrieval, call the method start. The method will request for permissions for all data types the user has not granted permissions for. The module will fetch data from Samsung Health until stop is called or the user revoked the authorization in the Samsung Health app.
| Code | Description |
|---|---|
| fun start(types: List |
Starts the Samsung Health service data retrieval and upload service with a list of SHealthDataTypes. Samsung Health authorization is done before starting the service. It is accompanied with a callback for further details. |
| fun stop(callback: ((ThryveResponse<Boolean>) -> Unit)?) | Stops the Samsung Health service. Does nothing if service is not running. It is accompanied with a callback for further details. |
Background data retrieval
The background retrieval of data from Samsung Health will be started automatically when calling start successfully. No further action is required.
Manual data retrieval
We recommend to use manual data retrieval methods to complement the background data retrieval as well as to retrieve historic data if required for you use-case.
The SDK allows you to trigger manual data retrieval using synchronize. This method will upload all data, both daily and epoch data, that was added to Samsung Health since the last data retrieval. This includes data that was added retrospectively by delayed Wearable sync (e.g. the Samsung Galaxy Watch was not connected to the Smartphone for a few days), data coming from third party apps or manually created data entries by the user. When the synchronize method is called for the first time for a user, it will upload the data for today.
| Code | Description |
|---|---|
| fun synchronize(types: List<SHealthDataType>, callback: ((ThryveResponse<Boolean>) -> Unit)?) | Performs synchronization of daily and epoch data for the specified types added to Samsung Health since the last upload. Call this function in order to synchronize data immediately. You can provide an optional callback to listen to the synchronization response. |
If your use-case requires for data recorded prior to the initial data sync after user authorization, the SDK provides methods to perform a backfill for historic timeframes. The methods will synchronize each epoch and daily data describing the provided timeframe.
| Code | Description |
|---|---|
| fun backfillEpoch(startDate: Date, endDate: Date, types: List<SHealthDataType>, callback: ((ThryveResponse |
Performs backfill of epoch data for the given timeframe, with a maximum of 30 days. If difference between timestamps is longer than 30 days, end date - 30 days is used as start date. You can provide an optional callback to listen to the backfill response. |
| fun backfillDaily(startDate: Date, endDate: Date, types: List<SHealthDataType>, callback: ((ThryveResponse |
Performs backfill of Daily data for the given timeframe, with a maximum of 365 days. If difference between timestamps is longer than 365 days, end date - 365 days is used as start date. You can provide an optional callback to listen to the backfill response. |
SHealth Error Codes
| Code | Name | Description |
|---|---|---|
| 60001 | ACCESS_TOKEN_INVALID | Missing or ivvalid access token. See Generate a Thryve user token. |
| 60010 | SYNC_START_AFTER_NOW | The start date set in backfillEpoch or backfillDaily is set as a date that is in the future. |
| 60011 | SYNC_END_AFTER_NOW | The end date set in backfillEpoch or backfillDaily is set as a date that is in the future. |
| 60012 | SYNC_END_BEFORE_START | The end date set in backfillEpoch or backfillDaily is set before the start date. |
| 60020 | ERROR_DISCONNECTION_PROCESS | Stopping/disconnecting Samsung Health connection has failed. |
| 60021 | ERROR_CONFIGURATION_PROCESS | Configuring Samsung Health connection has failed. |
| 60022 | ERROR_CONNECTION_FAILURE | Starting/connection Samsung Health connection has failed. |
| 60030 | ERROR_NO_AUTHORIZED_TYPES | Failed to synchronize or backfill due to no authorized types. |
SHealth: Method parameters
| Name | Type | Description |
|---|---|---|
| callback | (ThryveResponse) -> () | Callback containing ThryveResponse to check if successful and response data or in case of faile the error. |
    sHealthConnector?.backfillEpoch(startDate, endDate, sHealthDataTypes) { thryveResponse ->
        thryveResponse.errors.map { error -> Logger.d(TAG) { error.message } }
    }
Google Fit Native: Integration
Disclaimer: unreliable/discrepant Google Fit data:
Please acknowledge that data drawn from Google Fit REST and/or Google FitNative can deviate considerably from the data shown in the Google Fit app (e.g. up to 1000 steps difference). According to Google, it's due to the calculation engine that creates temporary differences. This has been a known issue and many clients are experiencing these persistent differences. Please refer to Google Fit official reference for further details.
To integrate Google Fit native with your Android app, you need to integrate the GFitModule of Thryve’s SDK. The module will allow your users to connect with Google Fit locally on their smartphone and will allow your app to trigger a background routine to retrieve both evaluated and aggregated values from different sources and sensors connected to Google Fit.
Google Fit Native: Constructor
Before calling any method of the Google Fit Native module, please create the corresponding corresponding GFitConnector.
import com.thryve.connector.module_gfit.GFitConnector

gfitConnector = new GFitConnector(activity, types)
| Code | Description |
|---|---|
| GFitConnector(activity: ComponentActivity, types: List<GFitDataType>? = null) | Creates the GFitConnector object with given activity and types. |
The Google Fit native integration through the Thryve SDK GFitModule will run as a service in the background. The first time the start() method is executed, a permission screen built-in the Android operating system will ask for the user's consent to grant access to the specified data types of Google Fit. The state of confirmation of this permission will be stored in the Android settings. The GFitModule methods need a Android Activity reference.
private fun toggleGFitIntegration() {
    if (!gFitConnector?.isActive()) {
        gFitConnector?.start(gFitPermissions) { response ->
            if (response.successful && response.data == true) {
                showMessage("GFit integration authorized and started")
            } else if (!response.successful && response.error != null) {
                showMessage("Error: ${response.error?.message}")
                gFitConnector?.stop(revokeAccess: true) {
                    showMessage("GoogleFitModule stop result: ${it.data}")
                }
            } else {
                showMessage("GFit integration Unauthorized")
            }
        }
    } else {
        gFitConnector?.stop(revokeAccess: true) {
            showMessage("GoogleFitModule stop result: ${it.data}")
        }
    }
}

override fun onRequestPermissionsResult(requestCode: Int, permissions: Array<String>, grantResults: IntArray) {
    super.onRequestPermissionsResult(requestCode, permissions, grantResults)
    gFitConnector?.onRequestPermissionsResult(requestCode, permissions, grantResults)
}

override fun onActivityResult(requestCode: Int, resultCode: Int, data: Intent?) {
    super.onActivityResult(requestCode, resultCode, data)
    gFitConnector?.onActivityResult(requestCode, resultCode, data)
}
Google Fit Native: Additional details
Request Android Permissions for Google Fit
<uses-permission android:name="android.permission.ACTIVITY_RECOGNITION"/>
To use the native integration of Google Fit, your application needs to acquire the Android Permission ACTIVITY_RECOGNITION from your user to access data. Please add the code sample on the right to the manifest file. The SDK will request the permission when using the start method.
Initiate the Android WorkManager
class App : Application, Configuration.Provider {
    override fun getWorkManagerConfiguration() =
            Configuration.Builder()
                    .setMinimumLoggingLevel(Log.VERBOSE)
                    .build()
The scheduling behaviour of the synchronization service of the Google Fit Native SDK module requires the custom configuration and initialization of the Android WorkManager Make sure to use the WorkManagerInitializer in your Application class by implementing Configuration.Provider. Please refer to the Kotlin/Java code sample on the right side of the documentation for guidance.
Check if Google Fit is available on the device
We recommend to use the isAvailable at the beginning of every session before using any other methods to avoid errors. If Google Fit is not available all other methods will fail and result in errors.
| Code | Description |
|---|---|
| isAvailable: Boolean | Checks if the device supports Google Fit. If the system app is not present on the device no data would be retrieved. |
Check if Google Fit is already connected
The isActive method will check if the start method was called successfully and if the connection is still active. If the method returns false, you trigger the connection by using the start method. We recommend to use this method before using any method for data retrieval to avoid errors.
| Code | Description |
|---|---|
| fun isActive() | Checks if Google Fit integration is active. Can be used for app internal logic or user feedback for GUIs etc. |
Get user authorization
Before you can retrieve any data, your app needs to be authorized to access Google Fit data by your users. To get authorization, use the start method and the corresponding dialogue will be shown on top of your app.
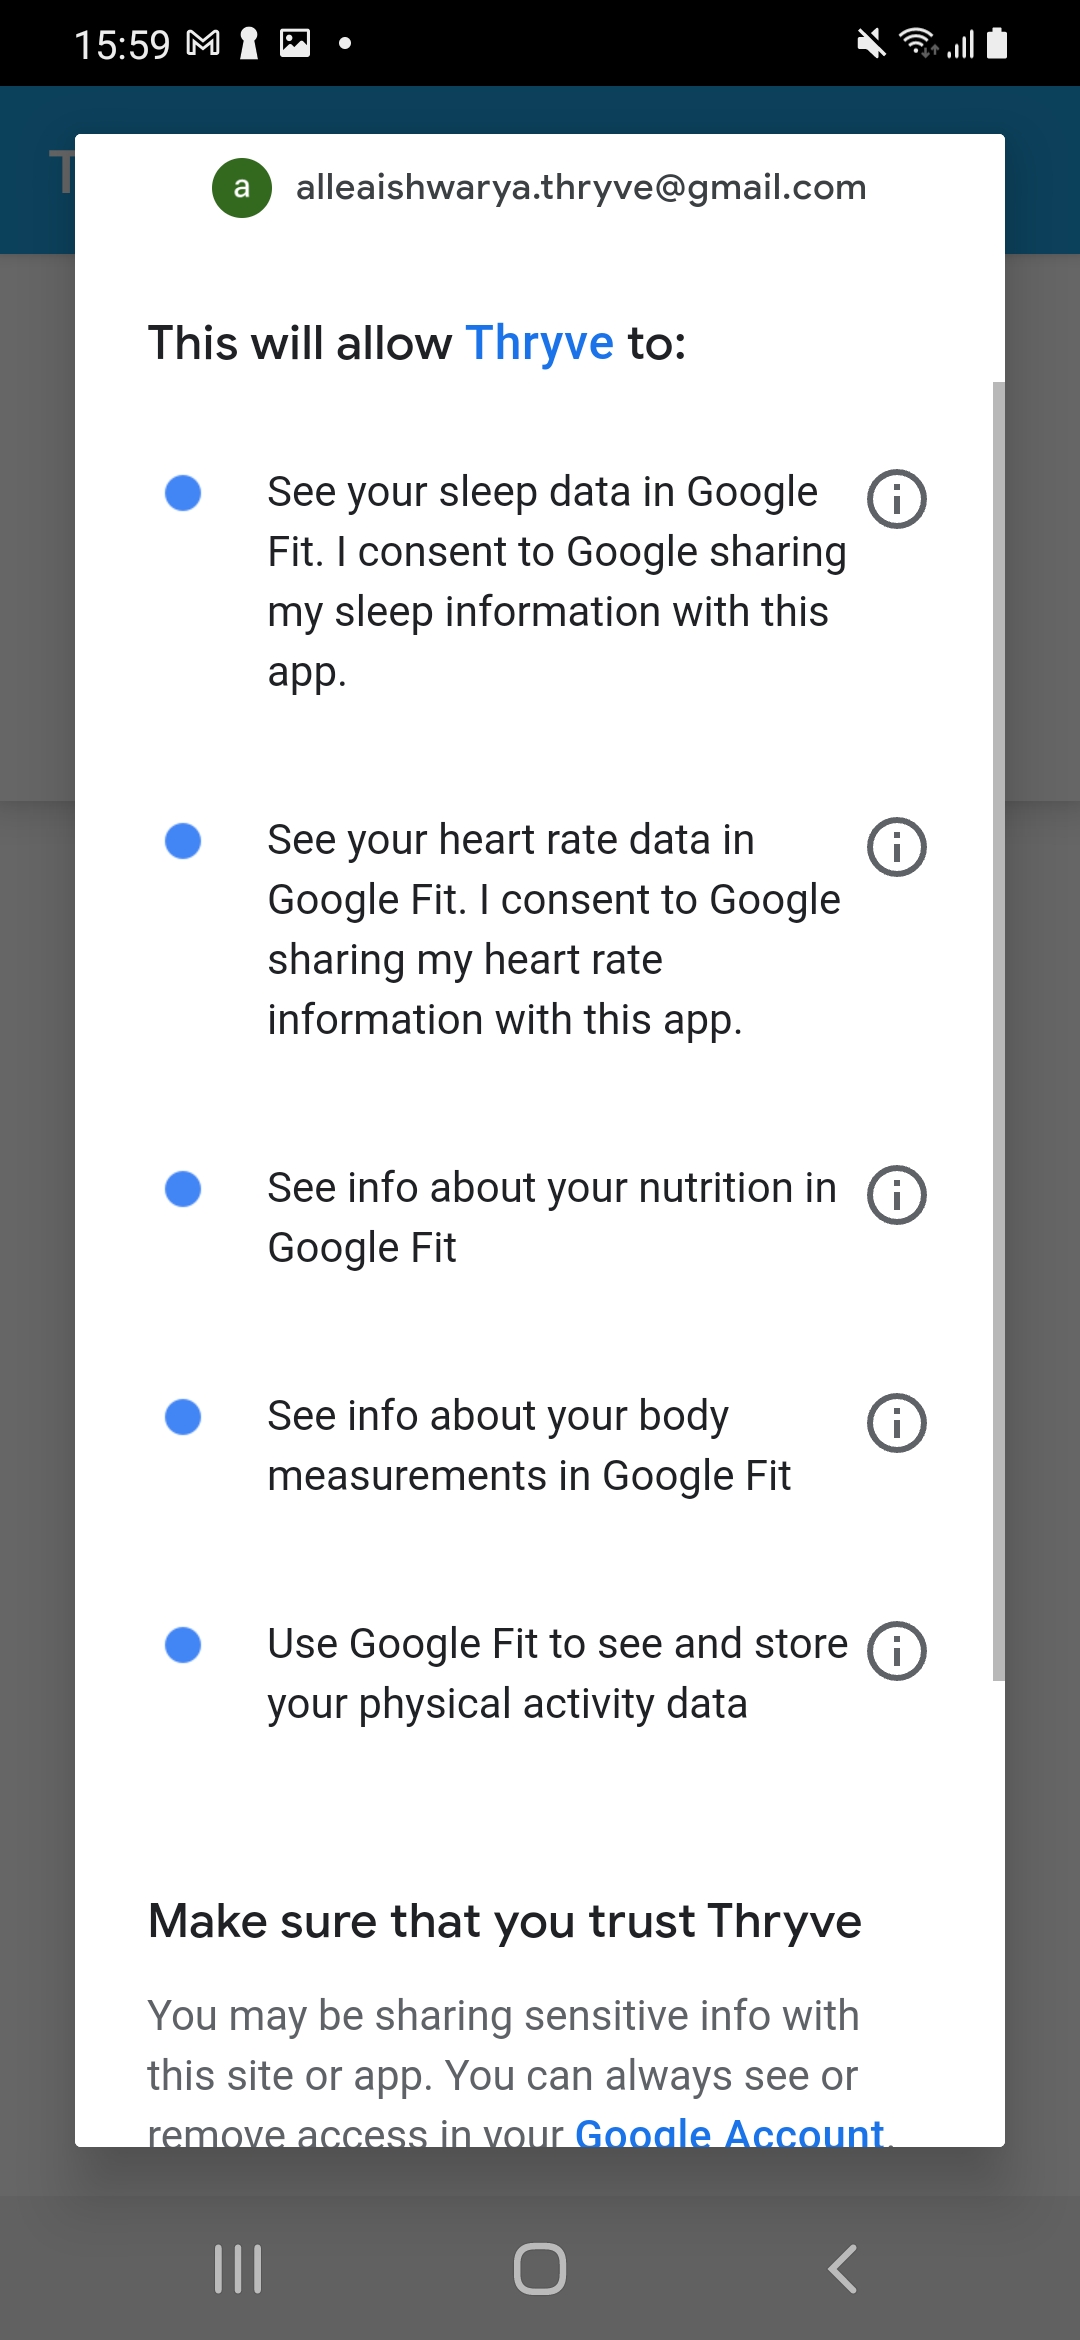
When using start specify the data you want to access by listing the corresponding GFitDataType. Only if the user grants permission to access the data, any data retrieval can be performed.
| Code | Description |
|---|---|
| fun start(types: List |
This method launches the Google Fit Native permission screen with the given requested types and starts the data retrieval. |
The start method will first trigger the process to acquire the Android Permission ACTIVITY_RECOGNITION for your app. If the user accepts, the user will see an authorization page with the data types you specified and needs to grant permission. Make sure to store the result of the authorization process with the onRequestPermissionsResult and onActivityResult methods.
| Code | Description |
|---|---|
| fun onRequestPermissionsResult(params) | This method will pass the parameters of the process of acquiring the Android Permission ACTIVITY_RECOGNITION to the connector object. |
| fun onActivityResult(params) | This method will pass the parameters of the process of acquiring the specified GFitDataType to the connector object. |
Check for authorization status
Google Fit Native allows developers to understand if the user has granted access to their health data and for what data types. We recommend to use this method before retrieving health data to check if the permissions are still active and to ensure permissions for the requested data types are granted.
| Code | Description |
|---|---|
| fun arePermissionsAcquired(): Boolean? | Checks whether a user has granted permission to access one or more data types. |
| fun getAcquiredPermissions(): List |
Checks which permissions from the current permission set are considered acquired by the GoogleFit and returning a set of GFitDataType, or null, if the permission check request failed. |
If the method arePermissionsAcquired returns false or getAcquiredPermissions does not return a data type you want access to, please instruct your user to manually grant access in the Google Fit app. This is needed as the permission screen dialogue can only be requested once for each data type.
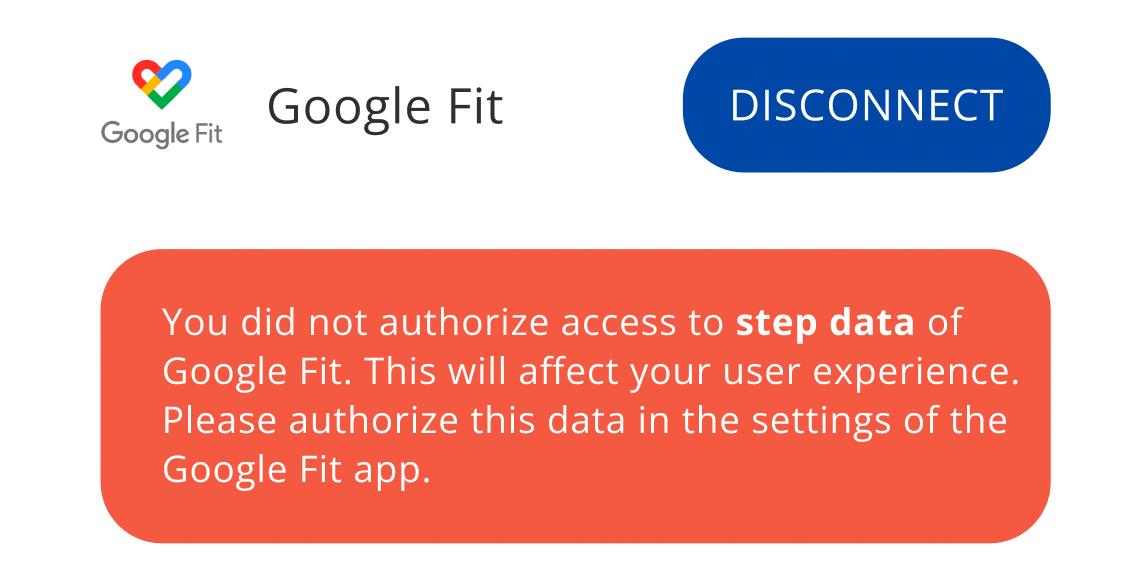
Example of informing user about missing
authorization of GFitDataTypes
GoogleFit Native: Data retrieval
Disclaimer: unreliable/discrepant GoogleFit data:
Please acknowledge that data drawn from GoogleFit REST and/or GoogleFitNative can deviate considerably from the data shown in the GoogleFit app (e.g. up to 1000 steps difference). According to Google, it's due to the calculation engine that creates temporary differences. This has been a known issue and many clients are experiencing these persistent differences. Please refer to GoogleFit official reference for further details.
The Google Fit Native SDK module does not require to initiate the data retrieval. When the end-user has authorized data access, data can be drawn immediately. The module will fetch data from Google Fit until stop was called or the user revoked the authorization in the Google Fit app.
| Code | Description |
|---|---|
| fun stop(revokeAccess: Boolean = false, callback: (ThryveResponse<Boolean>) -> Unit) | Stops the background Google Fit synchronization service, removes the connected source on the backend and resets some values to its defaults. Subsequent calls to synchronize or backfill data will fail. isActive() will return false aftwards. If revokeAccess is true the app's access to Google Fit data is revoked. The next time start() is called the user will need to authorize permission again. |
Background data retrieval
The background retrieval of data from Google Fit will be started automatically when calling start successfully. No further action is required.
Manual data retrieval
We recommend to use manual data retrieval methods to complement the background data retrieval as well as to retrieve historic data if required for you use-case.
The SDK allows you to trigger manual data retrieval using synchronize. This method will retrieve data, both daily and epoch data, for the timeframe from the last upload date till now. As Google Fit does not allow to retrieve specifically data that was added to the service since the last upload, synchronize will retrieve data for the timeframe since the last upload with a margin to account for retrospectively added data, e.g. by delayed WearOS wearable data sync, data coming from third party apps or manually created data entries by the user. When the synchronize method is called for the first time for a user, it will upload the data for today.
| Code | Description |
|---|---|
| fun synchronize(types: List<GFitDataType>, callback: ((ThryveResponse<Boolean>) -> Unit)?) | Performs synchronization of daily and epoch data for the specified types for the timeframe since the last upload till now with an additional margin. Call this function in order to synchronize data immediately. You can provide an optional callback to listen to the synchronization response. |
If your use-case requires for data recorded prior to the initial data sync after user authorization, the SDK provides methods to perform a backfill for historic timeframes. The methods will synchronize each epoch and daily data describing the provided timeframe.
| Code | Description |
|---|---|
| fun backfillEpoch(start: Date, end: Date, types: List<GFitDataType>, callback: ((ThryveResponse<Boolean>) -> Unit)?) | Performs backfill of epoch data for the given timeframe, with a maximum of 30 days. If the difference between timestamps is greater than 30 days, end date - 30 days is used as start date. You can provide an optional callback to listen to the backfill response. |
| fun backfillDaily(startDate: Date, endDate: Date, types: List<GFitDataType>, callback: ((ThryveResponse<Boolean>) -> Unit)?) | Performs backfill of Epoch data for the given timeframe, with a maximum of 265 days. If difference between is greater than 365 days, end date - 365 days is used as start date. You can provide an optional callback to listen to the backfill response. |
GoogleFit Native Error Codes
| Code | Name | Description |
|---|---|---|
| 80000 | GOOGLE_FIT_NOT_INSTALLED | Google Fit is not installed or can not be found on the device. |
| 80001 | ACCESS_TOKEN_INVALID | No valid access token found. See Generate a Thryve user token. |
| 80002 | GOOGLE_SIGN_IN_FAILED | Google Sign In failed. See http code or message for details. |
| 80003 | GOOGLE_SIGN_IN_EMPTY_GRANT_RESULTS | Google Sign In returned no granted permissions, or those permissions were denied. |
| 80004 | GOOGLE_SIGN_IN_CANCELLED | Google Sign In returned SIGN_IN_CANCELLED (12501). |
| 80005 | GOOGLE_SIGN_IN_CURRENTLY_IN_PROGRESS | Google Sign In returned SIGN_IN_CURRENTLY_IN_PROGRESS (12502). |
| 80010 | SYNC_START_AFTER_NOW | The start date set in backfillEpoch or backfillDaily is set as a date that is in the future. |
| 80011 | SYNC_END_AFTER_NOW | The end date set in backfillEpoch_ or backfillDaily is set as a date that is in the future. |
| 80012 | SYNC_END_BEFORE_START | The end date set in backfillEpoch or backfillDaily is set before the start date. |
| 80020 | GOOGLE_SIGNOUT_FAILURE | There was an error when terminating API Access to Google Fit for the given account. |
| 80021 | GOOGLE_FIT_DISABLE_FAILURE | There was an error when disabling Google Fit for the given account. |
| 80022 | GOOGLE_REVOKE_ACCESS_FAILURE | There was an error when revoking access of Google Sign In. |
| 80023 | GFIT_BE_REVOKE_FAILURE | There was an error when revoking the GFit Native connection on the backend. |
| 80030 | SYNC_ERROR_UNKNOWN | Unknown synchronization error. Check message or throwable for more details. |
Method parameters
| Name | Type | Description |
|---|---|---|
| callback | (ThryveResponse) -> () | Callback containing ThryveResponse to check if successful and response data or in case of faile the error. |
    googleFitConnector?.backfillEpoch(startDate, endDate, googleFitDataTypes) { thryveResponse ->
      if(!thryveResponse.successful)
        thryveResponse.errors.map { error -> Logger.d(TAG) { error.message } }
    }
Health Connect: Integration
To integrate Health Connect with your Android app, you need to integrate the HealthConnectModule of Thryve’s SDK. The module will allow your users to connect with Health Connect locally on their smartphone and will allow your app to retrieve both evaluated and aggregated values from different sources connected to Health Connect.
  dependencies {
    implementation("androidx.health.connect:connect-client:1.1.0-beta01")
  }
Integrating the Health Connect .arr library
Thryve provides the Health Connect module library as standard Android Archive (aar).
Core Connector or ThryveSDK: Constructor
import com.thryve.connector.sdk.ThryveSDK
import com.thryve.connector.sdk.model.ThryveSDKConfig

val appId: String = "FEh9HQNaa87cwdbB"
val appSecret: String = "NL7nTegPm5DKt8LrBZP62HQz6VNZaGuM"
val partnerUserId: String = "FVMW6fp9wnUxKnfekrQduZ96Xt6gemVk"
val language: String = "en"

val thryveSDKConfig = ThryveSDKConfig(appId, appSecret, partnerUserId = partnerUserId, language = language)
val thryveSDK = ThryveSDK.getOrCreate(thryveSDKConfig, activityComponent)

//get an existing instance of ThryveSDK
val thryveSDKInstance = ThryveSDK.get(activity)

//perform regular CoreConnector operations
thryveSDK?.getAccessToken()

val user = User(173, 74.2, "1990-01-18", Gender.MALE.string)
thryveSDK?.uploadUserInformation(user)
Health Connect: Constructor
Before calling any method of the Health Connect module, please create the corresponding ThryveHealthConnectConnector instance.
import com.thryve.connector.module_hconnect.ThryveHealthConnectConnector

thryveHealthConnectConfig = ThryveHealthConnectConnectorConfig(dataTypes = healthConnectDataTypes, enableBackgroundSync = true, enableReadHealthDataHistory = true)

healthConnectConnector = ThryveHealthConnectConnector.getOrCreate(context, dataTypes, thryveHealthConnectConfig)
import com.thryve.connector.module_hconnect.ThryveHealthConnectConnector

//gets an already existing instance
healthConnectConnector = ThryveHealthConnectConnector.get()
| Code | Description |
|---|---|
| ThryveHealthConnectConnectorConfig(dataTypes = healthConnectDataTypes, enableBackgroundSync = true, enableReadHealthDataHistory = true) | Creates a Health Connect configuration for the ThryveHealthConnectConnector. dataTypes is a optional List of ThryveHealthConnectDataType_s. _enableBackgroundSync is an optional Boolean to enable Health Connect background synchronisation: the default value is true. enableReadHealthDataHistory is an optional Boolean to enable Health Connect read data before connection date: the default value is true |
| ThryveHealthConnectConnector.getOrCreate(activity: ComponentActivity, types: List<ThryveHealthConnectDataType>?) | Creates or Gets (if instance is already created) the ThryveHealthConnectConnector object with given activity and types. |
| ThryveHealthConnectConnector.get() | Gets the ThryveHealthConnectConnector object that has been previously created. |
Check if Health Connect is available on the device
We recommend to use the isAvailable method at the beginning of every session before using any other methods to avoid errors. If Health Connect is not available all other methods will fail and result in errors.
| Code | Description |
|---|---|
| isAvailable(providerPackageName: String?, callback: ((ThryveResponse<Boolean>) -> Unit)?) | Checks if the device supports Health Connect. It takes an optional providerPackageName (defaults to com.google.android.apps.healthdata ). It is accompanied with an optional callback which receives a ThryveResponse that might contain a ThryveError with a message when Health Connect is not available on a device. |
Check if Health Connect is already connected
The isActive method will check if the start method was called successfully and if the connection is still active. If the method returns false, you trigger the connection by using the start method. We recommend to use this method before using any method for data retrieval to avoid errors.
| Code | Description |
|---|---|
| fun isActive(callback: ((ThryveResponse<Boolean>) -> Unit)?) | Checks if Health Connect integration is active. Can be used for app internal logic or user feedback for GUIs etc. It is accompanied with an optional callback which receives a ThryveResponse with a Boolean. |
Health Connect: Authorization and Connection
To authorize and connect to Health Connect, call the method start. If start is successfull, the module will be able fetch data from Health Connect until stop is called or the user revokes the authorization in the Health Connect app.
| Code | Description |
|---|---|
| fun start(activity: ComponentActivity, types: List<ThryveHealthConnectDataType>?, callback: ((ThryveResponse<Boolean>) -> Unit)?) | Checks if Health Connect is available on the device and requests for permissions for the provided types if not already authorized. Connection to Health Connect is authorized if permissions are granted otherwise, a ThryveResponse with a message in a ThryveError is returned to the optional callback. |
| fun stop(callback: ((ThryveResponse<Boolean>) -> Unit)?) | Stops the Health Connect service. Does nothing if service is not running. It is accompanied with a callback for further details. |
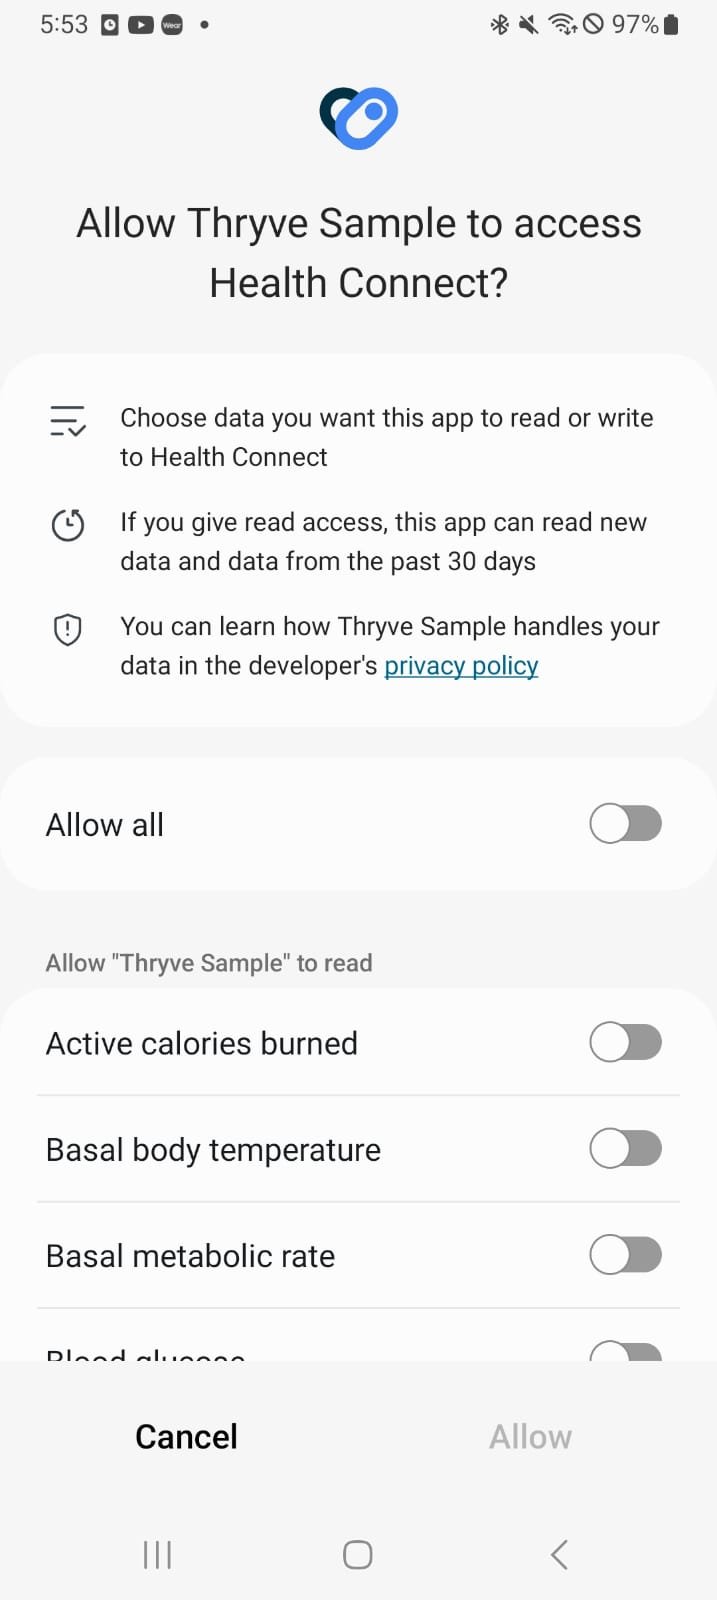
Check for authorization status
Health Connect allows developers to understand if the user has granted access to Health Connect data and for what data types. We recommend to use this method before retrieving health data to check if the permissions are still active and to ensure permissions for the requested data types are granted.
| Code | Description |
|---|---|
| fun arePermissionsAcquired(callback: ((ThryveResponse<Boolean>) -> Unit)?) | Checks whether a user has granted permissions to access all data types provided during the initialization of ThryveHealthConnectConnector . |
| fun getAcquiredPermissions(callback: ((ThryveResponse |
The callback receives a ThryveReponse with a map (with 0 to N values) of data types the user has currently granted access or not. Checks which permissions from the current permission set are considered acquired or not by the Health Connect Permissions Controller. If the permission check request failes, a ThryveError is retuned in the ThryveResponse. |
Health Connect: Data retrieval
| Code | Description |
|---|---|
| fun synchronize(types: List<ThryveHealthConnectDataType>, callback: ((ThryveResponse<Boolean>) -> Unit)?) | Performs a synchronization from all data added to Health Connect since the last upload date for a given type. Call this function in order to synchronize Epoch and Daily data immediately. You can provide an optional callback to listen to the synchronization response. |
If your use-case requires for data recorded prior to the initial data sync after user authorization, the SDK provides methods to perform a backfill for historic timeframes. The methods will synchronize each epoch and daily data describing the provided timeframe.
| Code | Description |
|---|---|
| fun backfillEpoch(startDate: Date, endDate: Date, types: List<ThryveHealthConnectDataType>, callback: ((ThryveResponse |
Performs backfill of epoch data for the given timeframe, with a maximum of 30 days. If difference between timestamps is longer than 30 days, an error is returned. You can provide an optional callback to listen to the backfill response. |
| fun backfillDaily(startDate: Date, endDate: Date, types: List<ThryveHealthConnectDataType>, callback: ((ThryveResponse |
Performs backfill of Daily data for the given timeframe, with a maximum of 365 days. If difference between timestamps is longer than 365 days, an error is returned. You can provide an optional callback to listen to the backfill response. |
Health Connect Error Codes
| Code | Name | Description |
|---|---|---|
| 90000 | _HEALTH_CONNECT_NOT_INSTALLED | Health Connect is not installed or can not be found on the device. |
| 90001 | ACCESS_TOKEN_INVALID | Access token is missing or invalid. See Generate a Thryve user token. |
| 90002 | HEALTH_CONNECT_MINIMUM_SDK | Health Connect minimum Android SDK support. |
| 90003 | HEALTH_CONNECT_NEEDS_UPDATE | Health Connect needs to be updated. |
| 90004 | HEALTH_CONNECT_NOT_ACTIVE | Health Connect is not activated. |
| 90005 | HEALTH_CONNECT_PERMISSIONS | Health Connect permissions related errors. |
| 90006 | HEALTH_CONNECT_CONNECTIVITY | Health Connect permissions related errors. |
| 90007 | HEALTH_CONNECT_UNSUPPORTED_DATA_TYPE | Health Connect unsupported data types. |
| 90008 | HEALTH_CONNECT_EXCEPTIONS | Health Connect unexpected exceptions. |
Health Connect: Method parameters
| Name | Type | Description |
|---|---|---|
| callback | (ThryveResponse) -> () | Callback containing ThryveResponse to check if successful and response data or in case of failure the error. |
    healthConnectConnector?.backfillEpoch(startDate, endDate, healthConnectDataTypes) { thryveResponse ->
      if(!thryveResponse.successful)
        thryveResponse.errors.map { error -> Logger.d(TAG) { error.message } }
    }
Integration for Web-Apps
The integration of Thryve into your web app does not require an SDK, but rather a collection of simple API-methods described in the next paragraphs. The methods allow to create a pseudonymous Thryve user token for your user and to allow your users to connect and disconnect 3rd party OAuth or direct access data sources. Please refer to the code snippets on the right side of the documentation for example implementations.
Generate a Thryve user
All data stored of any given end-user is linked to a pseudonymous Thryve user. This user is generated on backend side when calling the getAccessToken method. The method returns an accessToken, which is required for connecting data sources, uploading data or retrieving data for the user.
Additionally, you can set a unique identifier for the Thryve user. We call this the partnerUserID. Please ensure that the partnerUserID is an unguessable string generated e.g. through a hash-function. We suggest at least 32 digits, that may contain both digits, characters, and a dash „-„, as a special character. A partnerUserID can have a maximum length of 80 characters.
To set this unique identifier, please add the partnerUserID when calling the getAccessToken method. If an accessToken is returned, you defined your user’s partnerUserID successfully.
curl --location --request POST -u'healthapp:A7qmaxf9a' \
--header'AppAuthorization: Basic RkVoOUhRTmFhODdjd2RiQjpOTDduVGVnUG01REt0OExyQlpQNjJIUXo2Vk5aYUd1TQ==' \
--data-urlencode'partnerUserID=FVMW6fp9wnUxKnfekrQduZ96Xt6gemVk' --data-urlencode'language=en'\
'https://api.und-gesund.de/v5/accessToken'
post
https://api.und-gesund.de/v5/accessToken
|
Authorization
required
|
(Basic Auth) username:password |
|
AppAuthorization
required
|
(Basic Auth) appID:appSecret |
|
PartnerUserID
optional
|
An optional customerID, which allows Thryve to persistently relate the accessToken to a user. If a customerID is provided, Thryve will return the last valid accessToken previously created for this user instead of generating a new one. Example structure: FVMW6fp9wnUxKnfekrQduZ96Xt6gemVk. Note: partnerUserID is only allowed to consist of alphanumeric characters, and a dash, "-", as a special character. |
|
language
optional
|
Optionally determines the language setting for the corresponding user. Will be set as a string of the country code, e.g.: en. We currently support five languages: English, German, Spanish, French and Italian. If not set, the default partner language will be used. |
Responses
| Response Codes | Description |
|---|---|
| 200 | Request successful |
| 4xx | error code |
| accessToken | Sample response: de3d1e068537dd927b48988cb6969abe |
Sources connection
Having received the accessToken for your user, the following API call allows your user to connect their 3rd party devices via the data source connection screen. To give you a head-start we provide a ready-to-use website-URL for the data source connection screen that you can display e.g. as a Web view in your app – providing a seamless experience for your users.
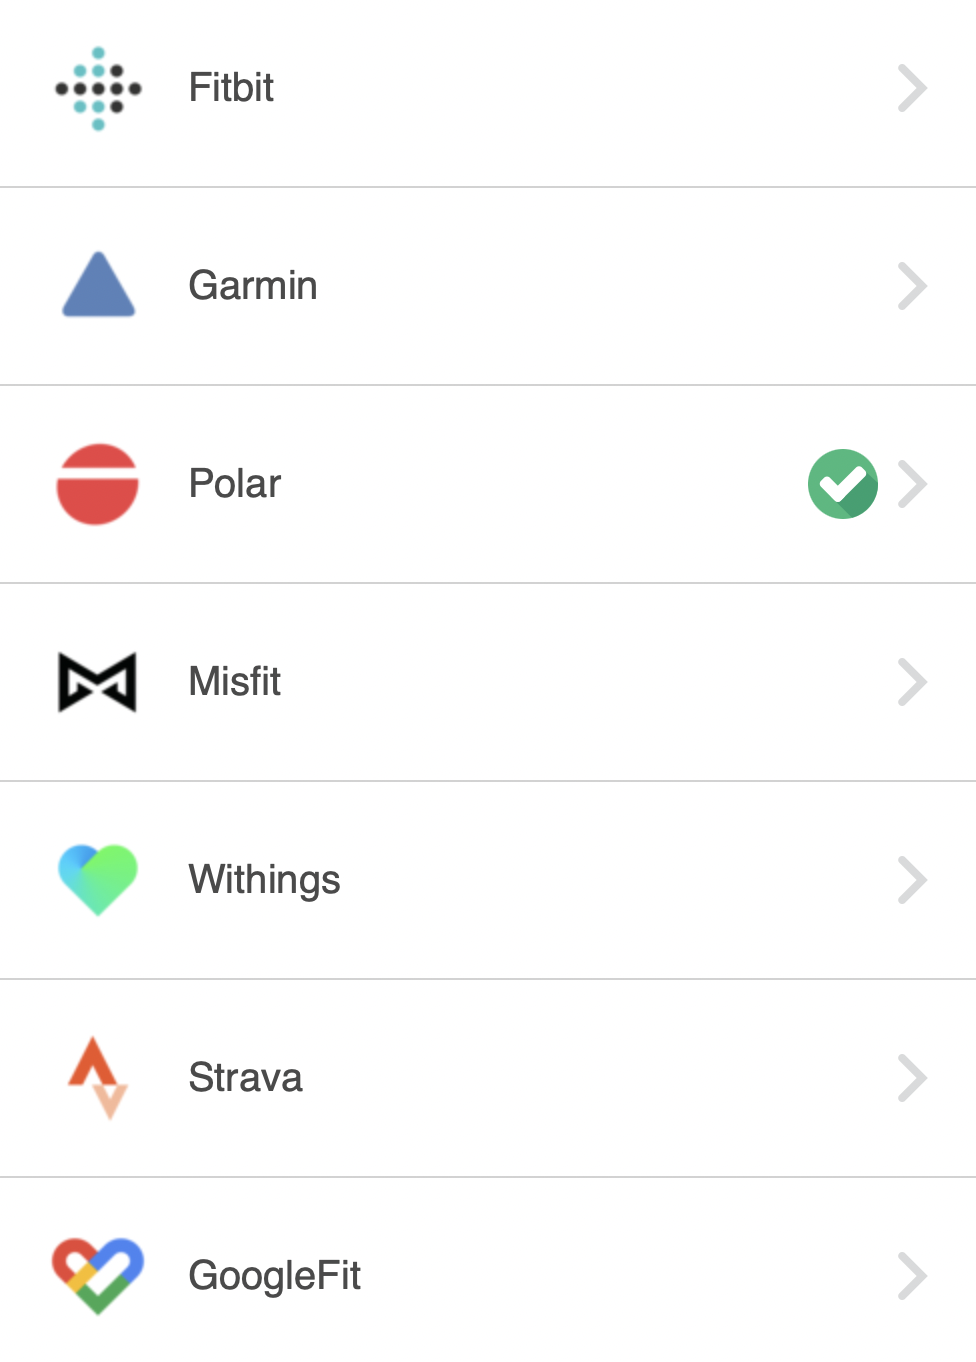
The following interface returns a URL-String that can be used for your users's data source connection.
curl --location --request POST -u'healthapp:A7qmaxf9a' \
--header'AppAuthorization: Basic RkVoOUhRTmFhODdjd2RiQjpOTDduVGVnUG01REt0OExyQlpQNjJIUXo2Vk5aYUd1TQ==' \
--data-urlencode'authenticationToken=de3d1e068537dd927b48988cb6969abe' \
'https://api.und-gesund.de/v5/dataSourceURL'
post
https://api.und-gesund.de/v5/dataSourceURL
|
Authorization
required
|
(Basic Auth) username:password |
|
AppAuthorization
required
|
(Basic Auth) appID:appSecret |
|
authenticationToken
required
|
The Thryve acces token generated for your user. Example: de3d1e068537dd927b48988cb6969abe |
Response example
https://service.und-gesund.de/dataSourceSelection.html?token=2098X4583882346015849835
Responses
| Response Codes | Description |
|---|---|
| 200 | Request successful |
| 4xx | error code |
Custom data source connection
If you want your users to connect their data source through your own data source connection screen or other GUI, there is also a possibility to directly open the corresponding tracker connection or revoke page.
Since the redirect logic must be connected to our server routines, you will need to open the tracker connection page in the same window with a URL that needs to be constructed as described in this chapter. Moreover, to correctly come back to your website, you will need to provide a redirect URL.
To open the correct tracker connection page, you will need to provide the Thryve internal source ID.
Construct direct connection URL
Direct connection example URL
https://service.und-gesund.de/dataSourceDirectConnection.html?token=2098X4583882346015849835&dataSource=1
Direct revoke example URL
https://service.und-gesund.de/dataSourceDirectRevoke.html?token=2098X4583882346015849835&dataSource=1&direct=true
The direct connection URLs are based on the access of the dataSourceSelection page. Thus you will need to call the dataSourceURL-interface as described in the corresponding section above: Sources connection.
The result URL will contain a parameter with the key token. Example structure:
https://service.und-gesund.de/dataSourceSelection.html?token=2098X4583882346015849835
Since this token is the temporary authentication for the data sources, it is needed to perform a request to the direct connection URL as well.
For direct connection or revoke, you will have to exchange the html file like the following:
- Connection: dataSourceDirectConnection.html
- Revoke: dataSourceDirectRevoke.html
For addressing the correct connection page, the data source ID must be added with the URL-parameter dataSource. Please also refer to the data sources overview that also lists all source ID's. Example structure:
dataSource=1 (e.g. for Fitbit)
For the revoke call, you may also add another URL-parameter to directly get redirected to the revoke page of the corresponding source. Thus the Thryve confirmation page won't be shown beforehand. For this, just set the parameter direct to true. If set to false or not set at all, the confirmation page will be shown as usual. Example structure:
direct=true
Please refer to the code example on the right to see a full built URL. This URL can now be opened in any browser.
Parse result
Direct connection result example URL
https://service.und-gesund.de/dataSourceDirectConnectionResult.html?token=2098X4583882346015849835&dataSource=2&connected=true
After the user interaction, the Thryve server will automatically redirect to the page
dataSourceDirectConnectionResult.html.
The URL-parameter connected will now indicate, if the connection or revoke was successful. The following states can happen:
- Connection: if connected is true, the connection was successful, if false, the user canceled the connection or something went wrong.
- Revoke: if connected is false, the revoke was successful, if true, the user canceled the revoke or something went wrong.
Please refer to the code example on the right to see a full result URL.
Handle redirect URL
Direct connection example URL
https://service.und-gesund.de/dataSourceDirectConnection.html?token=2098X4583882346015849835&dataSource=1&redirect_uri=https://example.com/result
Direct revoke example URL
https://service.und-gesund.de/dataSourceDirectRevoke.html?token=2098X4583882346015849835&dataSource=1&direct=true&redirect_uri=https://example.com/result
For a better user experience, you have also the possibility to set a redirect URL that will be used instead of the Thryve result page. This allows to seemlessly integrate into your web based application.
For this you will need to additionally set the URL-parameter redirect_uri for all direct connection calls. Example structure:
redirect_uri=https://example.com/result
The connected-result will also handed over to your URL.
Please refer to the code example on the right to see a full connection and revoke URL that contains the redirect URL as well.
Uploading Custom Data
The PartnerDataUpload allows you to upload custom data from the app to the Thryve data warehouse which is not data recorded by any data source. This might be a user’s demographic data like birthdate and gender or certain indications needed for health status calculation or other analytics of Thryve’s interpretation layer.
Data can be uploaded as DynamicEpochValues or DailyDynamicValue.
While information about dynamicEpochValues DataTypes to be uploaded can be found in the Biomarkers page, the Additional Recording Information section explains the information related to "details" parameter, stated in the payload.
DynamicEpochValue
JSON Object String example
{
  "data": [
    {
      "value": "38.7",
      "startTimestamp": "2020-01-20T07:07:00+01:00",
      "endTimestamp": "2020-01-20T07:08:00+01:00",
      "dynamicValueType": 5041,
      "details": {
        "trustworthiness": "plausible",
        "medicalGrade": true,
        "userReliability": "confirmed",
        "timezoneOffset": 120
      }
    }
  ]
}
curl --location --request PUT -u'healthapp:A7qmaxf9a' --header'Content-Type:application/json' \
--header'AppAuthorization: Basic RkVoOUhRTmFhODdjd2RiQjpOTDduVGVnUG01REt0OExyQlpQNjJIUXo2Vk5aYUd1TQ==' \
--header'authenticationToken:de3d1e068537dd927b48988cb6969abe' \
--data-urlencode'@data.json' 'https://api.und-gesund.de/v5/dynamicEpochValue'
PUT
https://api.und-gesund.de/v5/dynamicEpochValue
|
Authorization
required
|
(Basic Auth) username:password |
|
AppAuthorization
required
|
(Basic Auth) appID:appSecret |
|
authenticationToken
required
|
The Thryve acces token generated for your user. Example: de3d1e068537dd927b48988cb6969abe |
| [JSON Object String] | JSON object, including the data array that contains objects. Please check the right column for the structure and an example. |
While information about dynamicEpochValues DataTypes to be uploaded can be found in the Biomarkers page, the Additional Recording Information section explains the information related to "details" parameter, stated in the payload.
Responses
| Response Codes | Description |
|---|---|
| 204 | Upload successful |
| 4xx | error code |
DailyDynamicValue
JSON Object String example
{
  "data": [
    {
      "day": "2019-01-01",
      "dailyDynamicValueType": 5020,
      "value": 70.5
    }
  ]
}
curl --location --request PUT -u'healthapp:A7qmaxf9a' --header'Content-Type:application/json' \
--header'AppAuthorization: Basic RkVoOUhRTmFhODdjd2RiQjpOTDduVGVnUG01REt0OExyQlpQNjJIUXo2Vk5aYUd1TQ==' \
--header'authenticationToken:de3d1e068537dd927b48988cb6969abe' \
--data-urlencode'@data.json' 'https://api.und-gesund.de/v5/dailyDynamicValues'
PUT
https://api.und-gesund.de/v5/dailyDynamicValues
|
Authorization
required
|
(Basic Auth) username:password |
|
AppAuthorization
required
|
(Basic Auth) appID:appSecret |
|
authenticationToken
required
|
The Thryve acces token generated for your user. Example: de3d1e068537dd927b48988cb6969abe |
| [JSON Object String] | JSON object, including the data array that contains objects. Please check the right column for the structure and an example. |
Responses
| Response Codes | Description |
|---|---|
| 204 | Upload successful |
| 4xx | error code |
UserInformation
JSON Object String example
{
  "height": 192,
  "weight": 91,
  "birthdate": "1991-01-06",
  "gender": "male"
}
curl --location --request PUT -u'healthapp:A7qmaxf9a' --header'Content-Type:application/json' \
--header'AppAuthorization: Basic RkVoOUhRTmFhODdjd2RiQjpOTDduVGVnUG01REt0OExyQlpQNjJIUXo2Vk5aYUd1TQ==' \
--header'authenticationToken:de3d1e068537dd927b48988cb6969abe' \
--data-urlencode'@data.json' 'https://api.und-gesund.de/v5/userInformation'
PUT
https://api.und-gesund.de/v5/userInformation
|
Authorization
required
|
(Basic Auth) username:password |
|
AppAuthorization
required
|
(Basic Auth) appID:appSecret |
|
authenticationToken
required
|
The Thryve acces token generated for your user. Example: de3d1e068537dd927b48988cb6969abe |
| height | Height in centimeters. |
| weight | Weight in kilograms. |
| birthdate | Birth date in YYYY-MM-dd format. |
| gender | Gender information as String (i.e. male, female, genderless) |
Responses
| Response Codes | Description |
|---|---|
| 204 | Upload successful |
| 4xx | error code |
Cross-Platform-Integration
Thryve maintains most parts of the SDK and Modules for Cross-Platform-Integrations based on React Native CLI and Flutter.
React Native
import {CoreConnector} from '@thryve/react-native-core-sdk';
import {APP_ID, APP_SECRET} from '../constants/config';

export default (appId = APP_ID, appSecret = APP_SECRET) => {
  return new CoreConnector(appId, appSecret);
};
Developing React Native applications with the React Native CLI will result into projects that are usually deployed with Android Studio or Xcode for iOS. Please refer to the direct integration chapters for making use of the Thryve SDKs and modules:
   "dependencies": {
    "@thryve/react-native-apple-health-module": "file:../../thryve-react-native-apple-health-module-4.13.5.tgz",
    "@thryve/react-native-commons-module": "file:../../thryve-react-native-commons-module-4.13.5.tgz",
    "@thryve/react-native-core-sdk": "file:../../thryve-react-native-core-sdk-4.13.5.tgz",
    "@thryve/react-native-gfit-module": "file:../../thryve-react-native-gfit-module-4.13.5.tgz",
    "@thryve/react-native-shealth-module": "file:../../thryve-react-native-shealth-module-4.13.5.tgz",
    "react": "18.3.1",
    "react-native": "0.75.4",
  },
  "devDependencies": {
    "@types/react": "^18.2.6",
},
To integrate the React native SDK please follow the next few steps
- Check out Thryve React Native documentation.
- Create a React Native app. Please refer to the official guide.
- Put react-native-thryve-core-sdk-library library folder in your app folder.
- Inside package.json file, add dependency "react-native-thryve-core-sdk-library": "YOUR_PATH_TO_THE_LIBRARY"
- Add the Thryve repository and credentials as described below
- Run npm install or yarn install.
- Call the import statements. Please refer to the sample code to the right.
- The library should now be imported. Please refer to the sample code demonstrating the examples of available functions.
To integrate the React native SDK in your Expo project please follow the next few steps
- Install expo-build-properties in your project. refer to documentation.
- Add the expo-build-properties plugin to the plugins array in app.config.ts|app.config.js|app.json. A sample expo-build-properties plugin is shown below.
   "plugins": [
    ...
      [
        "expo-build-properties",
        {
          "android": {
            "compileSdkVersion": 34,
            "targetSdkVersion": 34,
            "buildToolsVersion": "35.0.0",
            "extraMavenRepos": [
              {
                "url": "https://nexus.external.thryve.de/repository/releases/",
                "credentials": {
                  "username": "PUT_NEXUS_USERNAME_HERE",
                  "password": "PUT_NEXUS_PASSWORD_HERE"
                }
              }
            ],
            "manifestQueries": {
              "package": [
                //If you are integrating Health Connect add
                "com.google.android.apps.healthdata",
                //If you are integrating Google Fit add
                "com.google.android.apps.fitness",
                //If you are integrating Samsung Health add
                "com.samsung.health",
                "com.sec.android.app.shealth"
              ]
            },
            "permissions": [
                //Add the Health Connect permissions you are interested here.
              "android.permission.health.READ_HEART_RATE"
            ]
          },
          "ios": {
            "extraPods": [
              {
                "name": "ThryveCore",
                "source": "https://git.thryve.de/thryve/Specs.git"
              },
              {
                "name": "ThryveCommons",
                "source": "https://git.thryve.de/thryve/Specs.git"
              },
              {
                "name": "ModuleBGM",
                "source": "https://git.thryve.de/thryve/Specs.git"
              },
              {
                "name": "ModuleAppleHealth",
                "source": "https://git.thryve.de/thryve/Specs.git"
              }
            ],
            "entitlements": {
              "com.apple.developer.healthkit": true,
              "com.apple.developer.healthkit.background-delivery": true
            },
            "infoPlist": {
              "NSHealthShareUsageDescription": " Allow to share your health data",
              "NSHealthUpdateUsageDescription": "Allow to update your health data",
              "UIBackgroundModes": [
                "fetch"
              ]
            },
            "privacyManifests": {
              "NSPrivacyAccessedAPITypes": [
                {
                  "NSPrivacyAccessedAPIType": "NSPrivacyAccessedAPICategorySystemBootTime",
                  "NSPrivacyAccessedAPITypeReasons": [
                    "CA92.1"
                  ]
                },
                {
                  "NSPrivacyAccessedAPIType": "NSPrivacyAccessedAPICategoryUserDefaults",
                  "NSPrivacyAccessedAPITypeReasons": [
                    "CA92.1"
                  ]
                }
              ]
            }
          }
        }
      ]
      ...
    ]
Enable Logging
The Core SDK provides a way to print and process logs generated by the Thryve SDK.
import React, { useCallback, useEffect } from 'react';
...
import coreConnectorInstance from './coreConnectorInstance';
import { LoggerVerbosity } from '@thryve/react-native-core-sdk';

const Tabs = createBottomTabNavigator();

const App = (): JSX.Element => {
  ...

  useEffect(() => {
    coreConnectorInstance.enableLogging(LoggerVerbosity.DEBUG);
  }, []);
  return (
    <GestureHandlerRootView style={{ flex: 1 }}>
    <GlobalLoaderContextProvider>
      ...
    </GlobalLoaderContextProvider>
    </GestureHandlerRootView>
  );
};

export default App;
| Code | Description |
|---|---|
| fun enableLogging(verbosity: LoggerVerbosity) | Initializes the native Logger which allows logs to be forwarded towards the system messages (e.g. readable by Logcat on Android). The verbosity is one of the following values• Verbosity.ERROR logs only errors.• Verbosity.WARN logs errors and warnings.• Verbosity.INFO logs errors, warnings, and information messages.• Verbosity.DEBUG logs errors, warnings, information messages, and debug/verbose messages. |
Thryve repository and credentials
To use the Thryve React Native SDK plugins for Android, you will need to set up the credentials for our private and protected Thryve repository, so that your project can request the dependencies.
In the Android app's root Gradle file ('../sample/android/build.gradle' in our case), locate your repositories section.
allprojects {
    repositories {
        google()
        mavenCentral()
        ...
    }
}
Below mavenCentral() or your last repository in case you have several, add ours.
build.gradle
allprojects {
    repositories {
        google()
        mavenCentral()
        ....
        //Thryve Maven Repository
        maven {
        url "https://nexus.external.thryve.de/repository/releases/"
        credentials {
            username = thryveUsername
            password = thryvePassword
        }
        ....
}
gradle.properties
thryveUsername=YOUR_THRYVE_PORTAL_USER
thryvePassword=YOUR_THRYVE_PORTAL_PASSWORD
Your credentials are the same as the ones you use in the Thryve API portal.
To prevent them being pushed in your repositories, you can store those in the project’s local.properties or the user-global Gradle properties.
Flutter
Developing Flutter applications with the Flutter SDK will result into projects that can be deployed with Android Studio or Xcode for iOS. Please refer to the direct integration chapters for a walk-through of the Thryve SDKs and modules:
Example of CoreSDK integration in Dart
class CoreService {
  ThryveCore _thryveCore;

  CoreService({String partnerUserId = 'Dart'}) {
    _thryveCore = ThryveCore(
        appId: 'FEh9HQNaa87cwdbB',
        appSecret: 'NL7nTegPm5DKt8LrBZP62HQz6VNZaGuM',
        partnerUserId: partnerUserId,
        language: 'en');
  }

  Future<String> getAccessToken() async => await _thryveCore.getAccessToken();
}

class YourWidget extends StatelessWidget {
    ...
    @override
    Widget build(BuildContext context) {
      return Container(
        child: FlatButton(
          onPressed: () async {
            final CoreService service = CoreService("FVMW6fp9wnUxKnfekrQduZ96Xt6gemVk");
            final accessToken = await service.getAccessToken();
          }),
        ),
      );
    }
    ...
}
Please refer to our Flutter Sample App for example implementations of the different modules.
To integrate the Flutter SDK please follow the next few steps
- Create a folder plugin inside the project's root directory.
- Drag the Thryve thryve_core Flutter plugin folder into the newly created plugin folder of the project.
- Go to pubspec.yaml file. Please make sure the environment sdk property is >=2.17.0 <3.0.0.
- Simply add in dependencies thryve_core: path: plugin/thryve_core
- Add the Thryve repository and credentials as described below
- After the setup try to build your project. The thryve_core plugin is integrated.
All available functions derive from the native SDK's:
- thryve_core.dart-file for ThryveCore.
- module_apple_health.dart-file for ModuleAppleHealth.
- module_shealth.dart-file for ModuleSHealth.
- module_gfit.dart-file for ModuleGFit.
The bridging between iOS and Android native code and Dart VM is already implemented appropriately for each platform. For better integration of functions related to get values like UserInformation the plugin already contains data modules inside the model package.
Thryve repository and credentials
To use the Thryve Flutter SDK plugins for Android, you will need to set up the credentials for our private and protected Thryve repository, so that your project can request the dependencies.
In the Android app's root Gradle file ('../sample/android/build.gradle' in our case), locate your repositories section.
allprojects {
    repositories {
        google()
        mavenCentral()
        ...
    }
}
Below mavenCentral() or your last repository in case you have several, add ours.
build.gradle
allprojects {
    repositories {
        google()
        mavenCentral()
        ....
        //Thryve Maven Repository
        maven {
        url "https://nexus.external.thryve.de/repository/releases/"
        credentials {
            username = thryveUsername
            password = thryvePassword
        }
        ....
}
gradle.properties
thryveUsername=YOUR_THRYVE_PORTAL_USER
thryvePassword=YOUR_THRYVE_PORTAL_PASSWORD
Your credentials are the same as the ones you use in the Thryve API portal.
To prevent them being pushed in your repositories, you can store those in the project’s local.properties or the user-global Gradle properties.
If you are using our default plugins without any modification, you can skip the next steps, as replacing the plugin folders will be sufficient.
Enable Logging
The native Core SDKs provide a way to print and process logs generated by the native Thryve SDKs.
Enable Logging on Android
class App : FlutterApplication(), Configuration.Provider {
    override val workManagerConfiguration: Configuration
        get() =  Configuration.Builder()
            .setMinimumLoggingLevel(Log.VERBOSE)
            .build()

    override fun onCreate() {
        super.onCreate()
        Logger.init(Logger.Verbosity.INFO)
    }
}
You need to add the Kotlin snippet on the right to your App class extending FlutterApplication. See native Android CoreSDK Logging for more details.
Enable Logging on iOS
@UIApplicationMain
@objc class AppDelegate: FlutterAppDelegate {

    override func application(
        _ application: UIApplication,
        didFinishLaunchingWithOptions launchOptions: [UIApplication.LaunchOptionsKey: Any]?
    ) -> Bool {
        GeneratedPluginRegistrant.register(with: self)
        Logger.enable(with: Logger.Verbosity.verbose)
        Logger.addLogCommand({log in
            let fm = FileManager.default
            if let documentDirectory = try? fm.url(
                for: .documentDirectory, in: .userDomainMask, appropriateFor: nil, create: false) {
                let fileUrl = documentDirectory
                    .appendingPathComponent("thryve_log_".appending(
                        Date().thryveUtils.dayStart.thryveUtils.formatted(with: Date.ThryveUtils.yyyyMMdd)))
                    .appendingPathExtension("txt")
                DispatchQueue.global(qos: .background).async {
                    if !fm.fileExists(atPath: fileUrl.path) {
                        fm.createFile(atPath: fileUrl.path, contents: nil)
                    }
                    do {
                        let handle = try FileHandle(forWritingTo: fileUrl)
                        handle.seekToEndOfFile()
                        handle.write(log.data(using: .utf8)!)
                        handle.write("\n".data(using: .utf8)!)
                        handle.closeFile()
                    } catch {
                        print("Failed appending to file \(fileUrl): \(error.localizedDescription)")
                    }
                }
            } else {
                print("Failed getting document directory!")
            }
        })
        return super.application(application, didFinishLaunchingWithOptions: launchOptions)
    }
}
You need to add the Swift snippet on the right to your AppDelegate extending FlutterAppDelegate. Optionally you can add a log command as shown to write logs to the app's documents directory. See native iOS CoreSDK Logging for more details.
Custom Thryve SDK plugins
If you have modified our plugins or run a self-made wrapper for our native libraries, you have to add either on a global app level or on each plugin wrapper the dependencies depending on your feature needs:
    api "com.thryve.connector:core:${thryve_sdk_version}"
    api "com.thryve.connector:commons:${thryve_sdk_version}"
    api "com.thryve.connector:shealth:${thryve_sdk_version}"
    api "com.thryve.connector:gfit:${thryve_sdk_version}"
The 'thryve_sdk_version' is the one mentioned in our slate documentation as latest available. You can store this value as we do, on a project-wide attribute, or per-plugin. It's important that you use 'api' instead of 'implementation' at least in Core and Commons so that they can be consumed by the other dependencies.